How to pick the best solder and flux for jewelry soldering?
By A Mystery Man Writer
Last updated 23 May 2024

With so many different solders available, it can be confusing for the beginner to know which one to chose. in this guide we explain the different types and grades of solder, explaining how you can use each one.
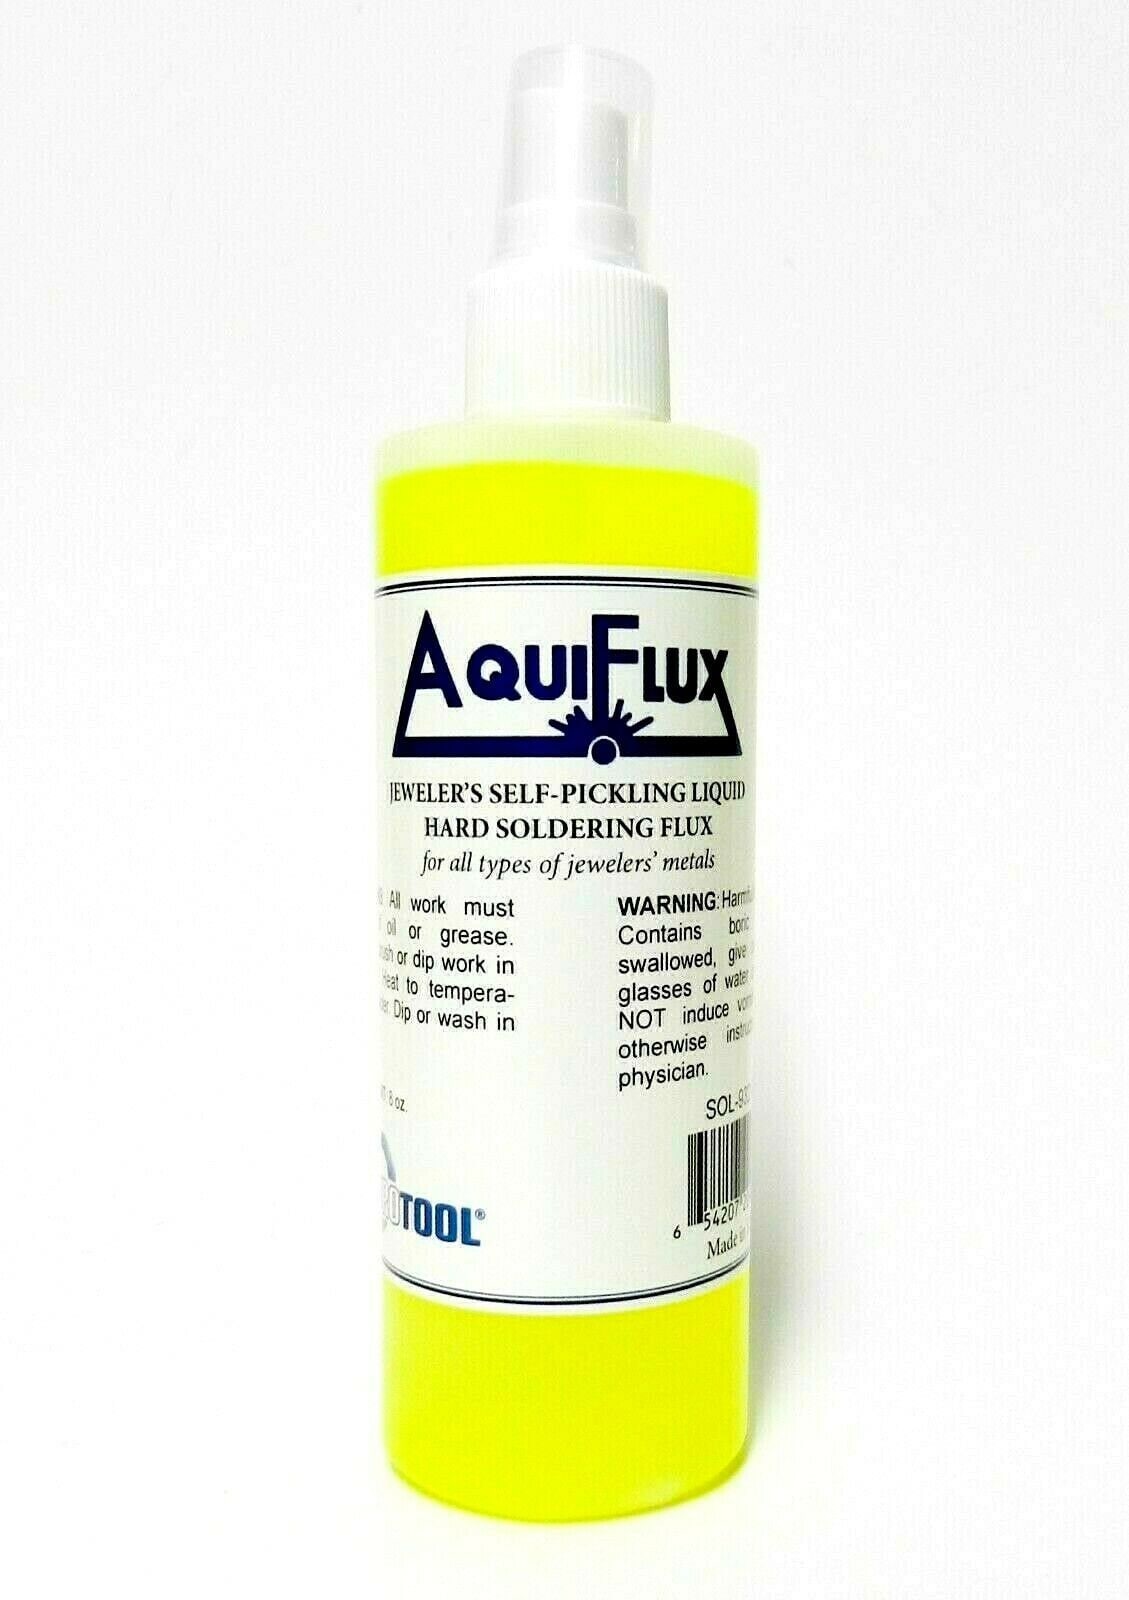
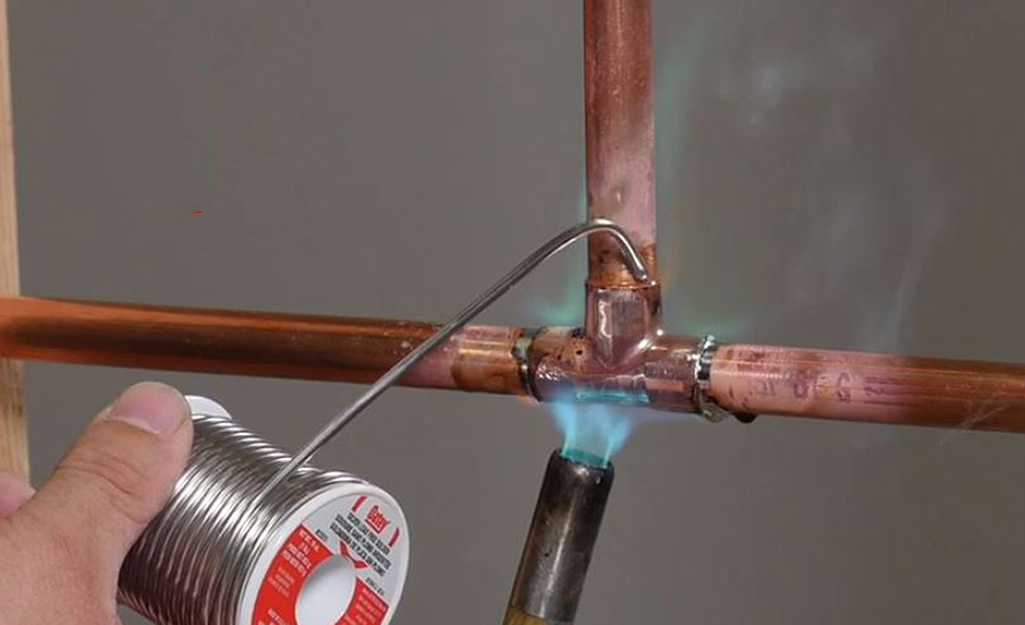
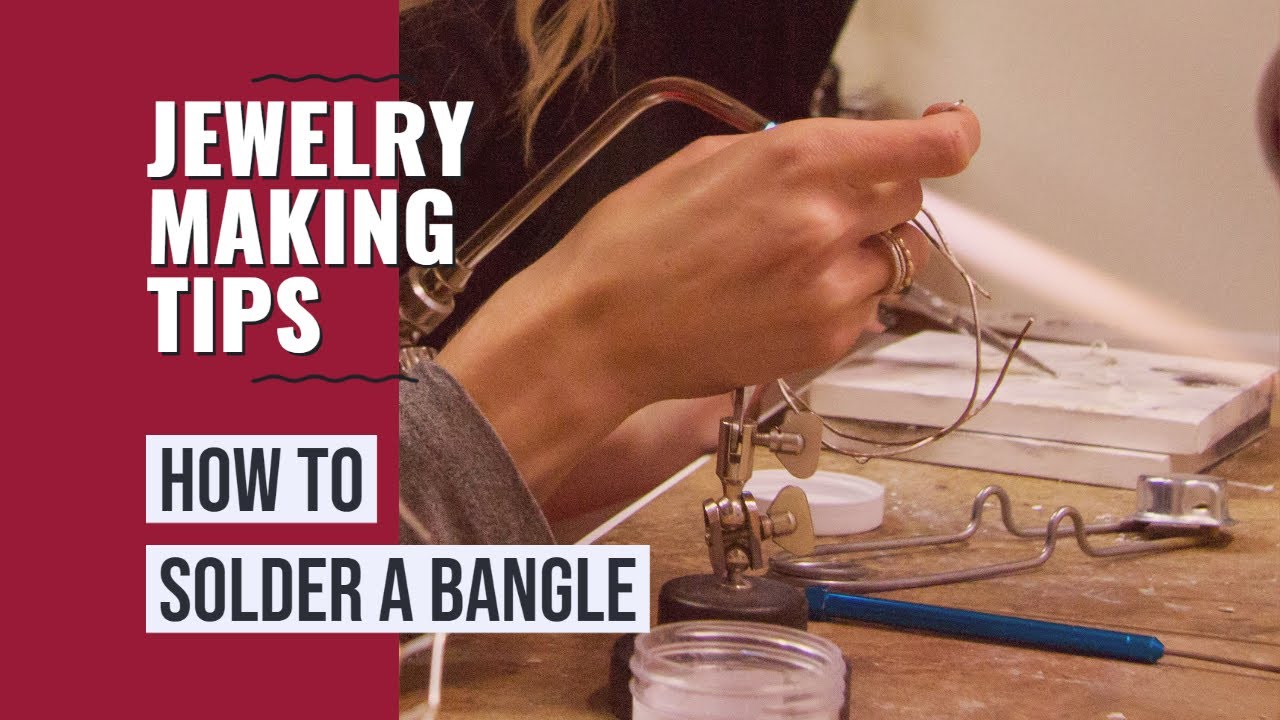
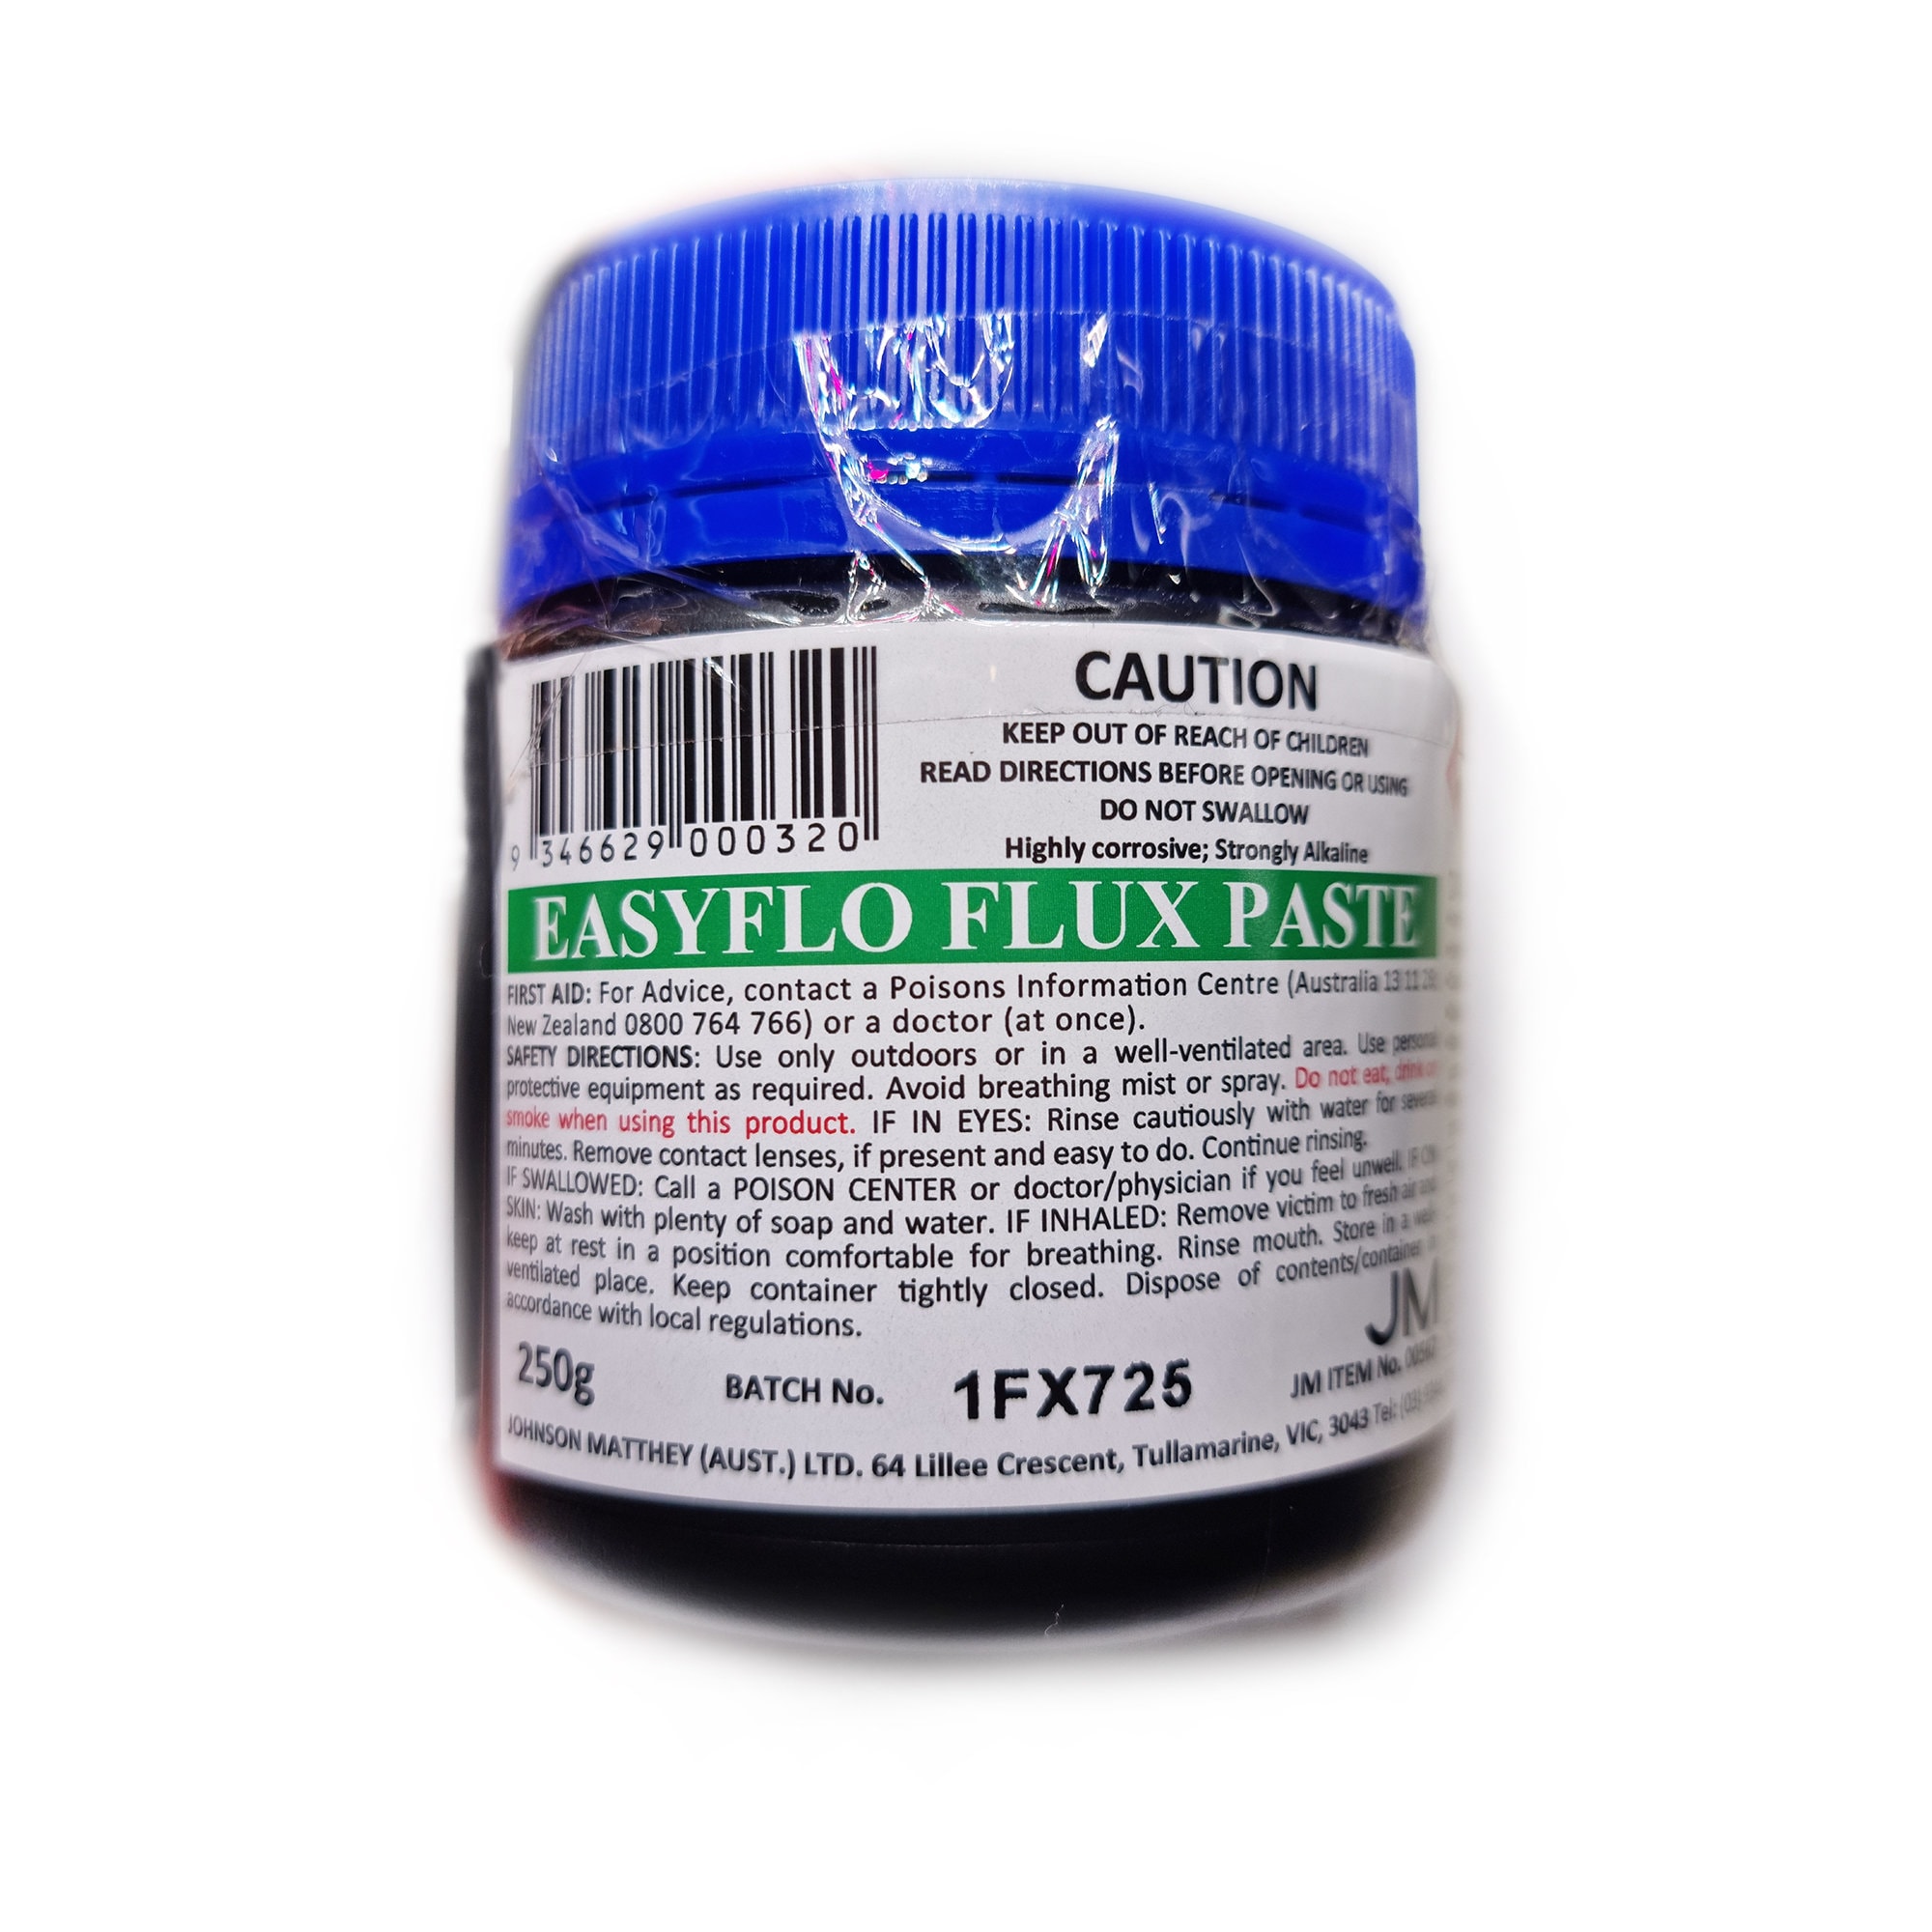
Jewelry soldering; Choosing the right solder and how to use it. Before we begin, we must first understand what exactly we mean by “soldering”. Many people confuse electronics soldering with Jewellery soldering and think that the two are the same - they are not. Electrical or electronics soldering uses very low-temperature solder and a soldering iron. Originally, electrical solder contained lead, but modern solders contain other alloys such as tin and copper, designed to melt at low temperatures. Usually, this is done with a heated soldering iron. Electrical solder should not be used on precious metal jewelry Similar low temp solder is also used by plumbers to connect copper pipes for water and gas supply. This is usually done with a portable blowtorch, due to the side of the pipes being used. But despite the use of a blowtorch this is still low temperature tin based solder and should not be used on precious metals. Despite some people on the internet selling this tin electrical solder as DIY Jewellery repair kits, it is vital to state that electrical tin-based solder should never be used on precious metals. Doing so will contaminate the piece and destroy its value. Tin solder and a soldering iron have no place in the toolkit of a professional jeweler. What jewelers refer to when we say soldering is a completely different process. When soldering precious metals such as silver, gold and platinum, the process requires solder alloys of precious metals. These precious metal solders melt at much higher temperatures (than electrical solders). This is why special jewellers gas torches are used. Soldering a sterling silver ring using silver solder, and a torch. Terminology Note that in the UK and Europe the term Carat Ct is used, whereas in the USA the term Karat K is used. The spelling may be different but they both refer to the same thing – parts per 24. In the UK 9ct Gold Jewellery is by far the most common. Whereas in the USA 10k and 14k are more popular. Asian Jewellery is often seen in 22ct and above. Also be aware that white gold, platinum and silver, may all look similar, but you should use the correct solder. So, it is important to lean how to read the hallmarks and ensure you know what you are working with. Match the metal. Metal Color Karat The first factor is the metal. This is not just a case of silver or gold, but you must also match the karat and color. For an 18K yellow gold ring, you should match 18k yellow gold solder. The use of lower karat solders (or electrical tin solder) will contaminate the precious metal and lower its purity. Using higher karat solder, may result in a visible join when the item is polished. (it is also more expensive). Remember that there is white gold, yellow gold and rose gold. Silver is usually sterling, but be aware that other grades exist, especially important if repairing foreign or antique items. Once again- ensure you know what metal you are working with and match the solder to it. English Hallmark on a ring.The lion and 925 tell us this ring is sterling silver. Choose the grade of solder. Each karat and color of solder will also come in easy, medium and hard. People are sometimes confused by the use of the word ‘hard’. This does not imply that the other solders are somehow softer or malleable. The designation refers to the relative melting temperatures. For example, if we look at silver. The melting point is 890 °C (1,640 °f) The silver solders are designed to melt slightly below this in ascending order Extra easy. 681 °C 1,257 °f Easy solder. 711 °C 1,311 °f Medium 747 °C 1,304 °f Hard 773 °C 1,423 °f You may also see enamelling solder up to 800 °C. 1472 °f This allows a piece to be soldered and then glass enamelled in a kiln without melting the solder. Hence this has the highest melting point and is very close to that of the silver itself. Which one should I use? The traditional explanation is that when making a piece from scratch, you start with hard solder. Additional parts of the jewelry can be soldered using medium solder at a slightly lower temperature, without melting out the previous solder joins. Likewise, further components could be added by using easy solder, and extra easy. The idea is that you can solder at successively lower temperatures without melting the previous (higher temp) joint. This approach still requires close control of your torch. In reality, once you become skilled with your torch you should be able to make everything with hard solder. Especially important with rings, as this means that it can be resized at a later date using easy solder. Repairs - make life easy When repairing a piece of Jewelry or resizing a ring, it may be safer to use easy solder, as the repair can be conducted at a lower temperature avoiding any damage caused by melting previous solder joints, or damage to stones. Extra easy Solder, melts at the lowest temperature. So this gives the ultimate safety for delicate items like thin chains . For a beginner to soldering, with a basic torch, extra easy will be very forgiving and allow you to practice soldering whilst minimizing the danger of melting your work. (We've all done it). However, as explained above you should ideally get used to soldering with hard solder, so that your pieces can be altered and repaired in the future. I make complex Celtic knots and bracelets with sterling silver wire. In some cases, a small knot has up to 6 solder joints in the one section. But with practice, this can all be accomplished easily with just hard solder. Learn to control the heat and focus the flame on each joint in turn. So, you know what metal, colour, karat, and grade of solder you want- But now you have a further choice. Just like precious metals, the solder comes in different physical shapes… Strip and sheet. Silver gold and platinum solder can be purchased in flat sheets or thin strips. These allow you to cut small pieces (Pallions) of solder however big you want and place them where you require. Cutting pallions. (fringing) You use a pair of tin snips to do this, using a technique called “fringing”. Begin by cutting a series of short cuts along the length of the solder, a few mm apart. While placing a finger over the cut end, you can then snip across the solder to cut off small pallions. (rather like hair cutting your fringe). Store in a small container, “clearly labelled”. This makes it very versatile and usually, strip and sheet offer the best value. 1. cutting the solder along the length 2. cutting across the solder. (Fringing) Tip – if you have a 925, Sil, or a karat punch, use this to mark your solder. If you have letter or number punches you can also mark H M E for hard medium or easy. You can also use a permanent marker. This avoids confusion when you have several strips on your bench. Keep them all labelled. tip- Use Karat punches to mark your solder. Wire silver and gold solder can also be purchased as round wire. Again, these come in Hard, Medium, easy and extra easy. Remember this is solder, and not to be confused with regular silver or gold wire. The wire can be great for beginners as it can either be used straight from the roll and applied to the price whilst heating. Alternatively, it is easily cut into short pieces, for easy application, using regular wire cutters. Buying long rolls is often better value. Flux In all cases above, sheet, wire or strip. The solder needs to be used with flux. Flux is applied to the joint before soldering. The purpose of flux is to prevent oxides from forming on the surface of the metal when heated. The solder will flow where you have applied the flux. There are many branded fluxes on the market. These are usually applied straight from the bottle with a small brush. Commercial Flux for jewellery making Borax cones. Many jewelers prefer the traditional method of using Borax. This comes in a hard cone and is rubbed around in an unglazed dish containing a few drops of water. The grinding of the borax, mixes with the water to produce a creamy paste, which is then applied to the Jewellery with a small brush. The advantage here is that the consistency of the paste can be adjusted easily by adding a few drops of water or thickened by more griding of the cone. With practice, you can achieve the precise consistency you require. Slightly thinner may be better where you want to flux to run inside a joint or tight area. Thicker paste may be more helpful when you don’t want it to run, perhaps on a vertical joint. A borax cone only costs a few dollars and can last years. So, it's also a very economical method. Borax cone & unglazed dish. Note the consistency on the brush. How to solder. Note “piece” refers to the item of Jewelry which you are soldering. The small snippet of solder or wire is referred to as a Pallion. The three golden rules Ensuring these three basic rules will ensure success. It’s all in the preparation. The joint to be soldered must be…. Close-fitting. Solder cannot bridge gaps or fill holes. The two sides of the pice need to come together flat level and close-fitting with no gaps in between. Clean. Solder will not flow where the metal is dirty, even grease from your finger can cause problems. Clean the joint and sand it with light emery paper. Avoid handling the joint, after you’ve cleaned it. Well fluxed. As explained above. The solder will only flow where the flux is. So ensure all surfaces to be soldered are well fluxed, including inside any gaps between two surfaces. Soldering is a Gentle process. When it comes to soldering, success is all down to the preparation. If you are having problems with your solder not flowing properly or the joint not being strong. Chances are, it is down to one of these problems above. The mistake often made by beginners is to apply more and more heat. But soldering is a “gentle” process, of slowly warming and heating the metal to the right temperature. Brute force is not the answer. So, if it isn’t working. Stop! Excessive heat will only create problems, such as surface ripples, fire stain, bubbles in the solder, and ultimately melting your piece and destroying it. If your solder is molten but is not flowing, then quench the piece, clean it up and start again, obeying the three golden rules above. Having prepared and fluxed your joint (let's say a silver ring). Place the ring on a heatproof surface such as a soldering block, or charcoal block. You may like to use insulated locking tweezers to hold the piece whilst you solder. Use the flux brush to pick up and place a small pallion of solder on the joint (this also fluxes the solder). Using a ‘soft’ blue flame, begin to heat the ring gently. The flux will boil and then dry. Watch for your solder falling off - you may need to replace it with steel tweezers. Slowly warm the ring until it starts to get red, then begin focusing the heat on the joint and the solder. As soon as the solder melts, move the flame away. Examine the joint and if needed apply a little more heat to the inside or outside of the ring to ‘pull’ the solder through. Note that solder will always run towards the heat. When you are happy, quench in water, pickle and rinse. Apply Flux to the piece. Place the solder. Heat gently. Heating the inside to 'pull' the solder through.Note the insulated tweezers. Pickling Pickling is dipping the piece in a weak acid. The acid cleans the oxides and flux from the metal and will leave it clean. Commercial pickle is available as a powder which mixes with warm water to create an acid solution. Always follow the manufacturer's instructions and safety advice when doing this. The pickle is usually kept warm in an electric heated “pickle pot” as it is far more effective when warm. Usually, just a few seconds will be sufficient to clean the piece. Rinse in water to wash off the pickle. The piece can then be further worked on as required. Pickle supplied as dry powder Electric Pickle pot. Tip, brass tweezers should be used to place items into the pickle steel tools can cause a reaction, leaving a red colour on your pieces. Pick soldering. For more experienced users, you can place the solder directly on the joint whilst it is hot. This avoids the problem of it jumping off when the flux boils. Begin by placing several pallions on your solder block off to one side. Flux the Jewelry as normal and heat until the flux dries (borax will produce a brown glassy film). Switch your flame to one of the solder pallions. As the pallion melts, it forms a small ball. Quickly remove the flame and insert a solder pick into the ball as it cools. You will then have a small ball of solder attached to the end of your solder pick. Return to heating the piece and place the ball of solder exactly where you want it. As it melts onto the piece, remove the pick. With practice, this can become a very quick and accurate way of working. Allowing you to complete multiple solder joints at the same time, on the same piece. This is the technique I use with my intricate Celtic knots. Pick soldering. Note how the solder is being placed on the joint using a solder pick. Solder picks. In order to work precisely like this, a good solder pick is an essential tool for moving and placing solder. You need a good grip, a strong point, and insulation against the heat. Pepetools make a selection of superb solder picks, crafted from specific materials such as aluminium and titanium for strength and durability. click the image to find out more. The superb Pepetools solder picks. Paste solder. In recent years an innovation has come to the market. Paste solder is supplied in a small syringe. This is a mixture of finely powdered solder, mixed with flux and cleaners. Just as before you must match the metal, color and karat. The solder is usually available in easy, medium and hard versions. Application is by a needle on the end of the syringe. The thick consistency sticks to the metal, so ensures very accurate solder placement. Apply the paste all around the joint. There is no need to separately apply flux or borax, Just apply the paste and heat. Start slowly with a soft flame warming the piece first. The paste will dry out, and then melt to clean and flux the joint. With more heat, the microscopic particles of solder will melt together forming the solder and filling the joint. Paste 'Syringe' solder. Whilst separate flux is not required, this is no excuse for short cuts. You must still observe the three golden rules and ensure your piece is clean, well fluxed (with the paste itself), and close-fitting. Whilst it may appear like the cold paste will fill a gap or hole, once molten it will flow as normal. Just as with strips and wire, the solder cannot be used to bridge gaps or fill holes. Syringe paste is now the preferred method for many jewelers due to the precision, speed and efficiency. offer a range of solders in different metals, colors and grades. As well as other tools and supplies. Click the link to find out more. Written and illustratedby Dave Wilsonwww.celticdreams.co.uk © 2020 Pepetools.www.
Jewelry soldering; Choosing the right solder and how to use it. Before we begin, we must first understand what exactly we mean by “soldering”. Many people confuse electronics soldering with Jewellery soldering and think that the two are the same - they are not. Electrical or electronics soldering uses very low-temperature solder and a soldering iron. Originally, electrical solder contained lead, but modern solders contain other alloys such as tin and copper, designed to melt at low temperatures. Usually, this is done with a heated soldering iron. Electrical solder should not be used on precious metal jewelry Similar low temp solder is also used by plumbers to connect copper pipes for water and gas supply. This is usually done with a portable blowtorch, due to the side of the pipes being used. But despite the use of a blowtorch this is still low temperature tin based solder and should not be used on precious metals. Despite some people on the internet selling this tin electrical solder as DIY Jewellery repair kits, it is vital to state that electrical tin-based solder should never be used on precious metals. Doing so will contaminate the piece and destroy its value. Tin solder and a soldering iron have no place in the toolkit of a professional jeweler. What jewelers refer to when we say soldering is a completely different process. When soldering precious metals such as silver, gold and platinum, the process requires solder alloys of precious metals. These precious metal solders melt at much higher temperatures (than electrical solders). This is why special jewellers gas torches are used. Soldering a sterling silver ring using silver solder, and a torch. Terminology Note that in the UK and Europe the term Carat Ct is used, whereas in the USA the term Karat K is used. The spelling may be different but they both refer to the same thing – parts per 24. In the UK 9ct Gold Jewellery is by far the most common. Whereas in the USA 10k and 14k are more popular. Asian Jewellery is often seen in 22ct and above. Also be aware that white gold, platinum and silver, may all look similar, but you should use the correct solder. So, it is important to lean how to read the hallmarks and ensure you know what you are working with. Match the metal. Metal Color Karat The first factor is the metal. This is not just a case of silver or gold, but you must also match the karat and color. For an 18K yellow gold ring, you should match 18k yellow gold solder. The use of lower karat solders (or electrical tin solder) will contaminate the precious metal and lower its purity. Using higher karat solder, may result in a visible join when the item is polished. (it is also more expensive). Remember that there is white gold, yellow gold and rose gold. Silver is usually sterling, but be aware that other grades exist, especially important if repairing foreign or antique items. Once again- ensure you know what metal you are working with and match the solder to it. English Hallmark on a ring.The lion and 925 tell us this ring is sterling silver. Choose the grade of solder. Each karat and color of solder will also come in easy, medium and hard. People are sometimes confused by the use of the word ‘hard’. This does not imply that the other solders are somehow softer or malleable. The designation refers to the relative melting temperatures. For example, if we look at silver. The melting point is 890 °C (1,640 °f) The silver solders are designed to melt slightly below this in ascending order Extra easy. 681 °C 1,257 °f Easy solder. 711 °C 1,311 °f Medium 747 °C 1,304 °f Hard 773 °C 1,423 °f You may also see enamelling solder up to 800 °C. 1472 °f This allows a piece to be soldered and then glass enamelled in a kiln without melting the solder. Hence this has the highest melting point and is very close to that of the silver itself. Which one should I use? The traditional explanation is that when making a piece from scratch, you start with hard solder. Additional parts of the jewelry can be soldered using medium solder at a slightly lower temperature, without melting out the previous solder joins. Likewise, further components could be added by using easy solder, and extra easy. The idea is that you can solder at successively lower temperatures without melting the previous (higher temp) joint. This approach still requires close control of your torch. In reality, once you become skilled with your torch you should be able to make everything with hard solder. Especially important with rings, as this means that it can be resized at a later date using easy solder. Repairs - make life easy When repairing a piece of Jewelry or resizing a ring, it may be safer to use easy solder, as the repair can be conducted at a lower temperature avoiding any damage caused by melting previous solder joints, or damage to stones. Extra easy Solder, melts at the lowest temperature. So this gives the ultimate safety for delicate items like thin chains . For a beginner to soldering, with a basic torch, extra easy will be very forgiving and allow you to practice soldering whilst minimizing the danger of melting your work. (We've all done it). However, as explained above you should ideally get used to soldering with hard solder, so that your pieces can be altered and repaired in the future. I make complex Celtic knots and bracelets with sterling silver wire. In some cases, a small knot has up to 6 solder joints in the one section. But with practice, this can all be accomplished easily with just hard solder. Learn to control the heat and focus the flame on each joint in turn. So, you know what metal, colour, karat, and grade of solder you want- But now you have a further choice. Just like precious metals, the solder comes in different physical shapes… Strip and sheet. Silver gold and platinum solder can be purchased in flat sheets or thin strips. These allow you to cut small pieces (Pallions) of solder however big you want and place them where you require. Cutting pallions. (fringing) You use a pair of tin snips to do this, using a technique called “fringing”. Begin by cutting a series of short cuts along the length of the solder, a few mm apart. While placing a finger over the cut end, you can then snip across the solder to cut off small pallions. (rather like hair cutting your fringe). Store in a small container, “clearly labelled”. This makes it very versatile and usually, strip and sheet offer the best value. 1. cutting the solder along the length 2. cutting across the solder. (Fringing) Tip – if you have a 925, Sil, or a karat punch, use this to mark your solder. If you have letter or number punches you can also mark H M E for hard medium or easy. You can also use a permanent marker. This avoids confusion when you have several strips on your bench. Keep them all labelled. tip- Use Karat punches to mark your solder. Wire silver and gold solder can also be purchased as round wire. Again, these come in Hard, Medium, easy and extra easy. Remember this is solder, and not to be confused with regular silver or gold wire. The wire can be great for beginners as it can either be used straight from the roll and applied to the price whilst heating. Alternatively, it is easily cut into short pieces, for easy application, using regular wire cutters. Buying long rolls is often better value. Flux In all cases above, sheet, wire or strip. The solder needs to be used with flux. Flux is applied to the joint before soldering. The purpose of flux is to prevent oxides from forming on the surface of the metal when heated. The solder will flow where you have applied the flux. There are many branded fluxes on the market. These are usually applied straight from the bottle with a small brush. Commercial Flux for jewellery making Borax cones. Many jewelers prefer the traditional method of using Borax. This comes in a hard cone and is rubbed around in an unglazed dish containing a few drops of water. The grinding of the borax, mixes with the water to produce a creamy paste, which is then applied to the Jewellery with a small brush. The advantage here is that the consistency of the paste can be adjusted easily by adding a few drops of water or thickened by more griding of the cone. With practice, you can achieve the precise consistency you require. Slightly thinner may be better where you want to flux to run inside a joint or tight area. Thicker paste may be more helpful when you don’t want it to run, perhaps on a vertical joint. A borax cone only costs a few dollars and can last years. So, it's also a very economical method. Borax cone & unglazed dish. Note the consistency on the brush. How to solder. Note “piece” refers to the item of Jewelry which you are soldering. The small snippet of solder or wire is referred to as a Pallion. The three golden rules Ensuring these three basic rules will ensure success. It’s all in the preparation. The joint to be soldered must be…. Close-fitting. Solder cannot bridge gaps or fill holes. The two sides of the pice need to come together flat level and close-fitting with no gaps in between. Clean. Solder will not flow where the metal is dirty, even grease from your finger can cause problems. Clean the joint and sand it with light emery paper. Avoid handling the joint, after you’ve cleaned it. Well fluxed. As explained above. The solder will only flow where the flux is. So ensure all surfaces to be soldered are well fluxed, including inside any gaps between two surfaces. Soldering is a Gentle process. When it comes to soldering, success is all down to the preparation. If you are having problems with your solder not flowing properly or the joint not being strong. Chances are, it is down to one of these problems above. The mistake often made by beginners is to apply more and more heat. But soldering is a “gentle” process, of slowly warming and heating the metal to the right temperature. Brute force is not the answer. So, if it isn’t working. Stop! Excessive heat will only create problems, such as surface ripples, fire stain, bubbles in the solder, and ultimately melting your piece and destroying it. If your solder is molten but is not flowing, then quench the piece, clean it up and start again, obeying the three golden rules above. Having prepared and fluxed your joint (let's say a silver ring). Place the ring on a heatproof surface such as a soldering block, or charcoal block. You may like to use insulated locking tweezers to hold the piece whilst you solder. Use the flux brush to pick up and place a small pallion of solder on the joint (this also fluxes the solder). Using a ‘soft’ blue flame, begin to heat the ring gently. The flux will boil and then dry. Watch for your solder falling off - you may need to replace it with steel tweezers. Slowly warm the ring until it starts to get red, then begin focusing the heat on the joint and the solder. As soon as the solder melts, move the flame away. Examine the joint and if needed apply a little more heat to the inside or outside of the ring to ‘pull’ the solder through. Note that solder will always run towards the heat. When you are happy, quench in water, pickle and rinse. Apply Flux to the piece. Place the solder. Heat gently. Heating the inside to 'pull' the solder through.Note the insulated tweezers. Pickling Pickling is dipping the piece in a weak acid. The acid cleans the oxides and flux from the metal and will leave it clean. Commercial pickle is available as a powder which mixes with warm water to create an acid solution. Always follow the manufacturer's instructions and safety advice when doing this. The pickle is usually kept warm in an electric heated “pickle pot” as it is far more effective when warm. Usually, just a few seconds will be sufficient to clean the piece. Rinse in water to wash off the pickle. The piece can then be further worked on as required. Pickle supplied as dry powder Electric Pickle pot. Tip, brass tweezers should be used to place items into the pickle steel tools can cause a reaction, leaving a red colour on your pieces. Pick soldering. For more experienced users, you can place the solder directly on the joint whilst it is hot. This avoids the problem of it jumping off when the flux boils. Begin by placing several pallions on your solder block off to one side. Flux the Jewelry as normal and heat until the flux dries (borax will produce a brown glassy film). Switch your flame to one of the solder pallions. As the pallion melts, it forms a small ball. Quickly remove the flame and insert a solder pick into the ball as it cools. You will then have a small ball of solder attached to the end of your solder pick. Return to heating the piece and place the ball of solder exactly where you want it. As it melts onto the piece, remove the pick. With practice, this can become a very quick and accurate way of working. Allowing you to complete multiple solder joints at the same time, on the same piece. This is the technique I use with my intricate Celtic knots. Pick soldering. Note how the solder is being placed on the joint using a solder pick. Solder picks. In order to work precisely like this, a good solder pick is an essential tool for moving and placing solder. You need a good grip, a strong point, and insulation against the heat. Pepetools make a selection of superb solder picks, crafted from specific materials such as aluminium and titanium for strength and durability. click the image to find out more. The superb Pepetools solder picks. Paste solder. In recent years an innovation has come to the market. Paste solder is supplied in a small syringe. This is a mixture of finely powdered solder, mixed with flux and cleaners. Just as before you must match the metal, color and karat. The solder is usually available in easy, medium and hard versions. Application is by a needle on the end of the syringe. The thick consistency sticks to the metal, so ensures very accurate solder placement. Apply the paste all around the joint. There is no need to separately apply flux or borax, Just apply the paste and heat. Start slowly with a soft flame warming the piece first. The paste will dry out, and then melt to clean and flux the joint. With more heat, the microscopic particles of solder will melt together forming the solder and filling the joint. Paste 'Syringe' solder. Whilst separate flux is not required, this is no excuse for short cuts. You must still observe the three golden rules and ensure your piece is clean, well fluxed (with the paste itself), and close-fitting. Whilst it may appear like the cold paste will fill a gap or hole, once molten it will flow as normal. Just as with strips and wire, the solder cannot be used to bridge gaps or fill holes. Syringe paste is now the preferred method for many jewelers due to the precision, speed and efficiency. offer a range of solders in different metals, colors and grades. As well as other tools and supplies. Click the link to find out more. Written and illustratedby Dave Wilsonwww.celticdreams.co.uk © 2020 Pepetools.www.

SFC Tools Standard Jewelry Soldering Kit Silver Solder Wire Kit-1750

Dropship Solder Wire 5 Pack Rosin Core Flux Soldering Wire 63/37 63% Tin (Sn)37% Lead (Pb) 1 Pc 50 Gms 5 Core Solder WireRatings Best Deal (5 Pieces) to Sell Online at a Lower Price

Jewelry Soldering Kit Flux Ceramic Silver Solder Board Third Hand Pick Tweezers
Aquiflux Self Pickling Flux Gold Silver Jewelry Hard Soldering 1/2 Pint 8oz - Israel

soldering gun for jewelry making, SAVE 19%

Silver Solder Sheet & Handy Flux Jewelry Soldering Soft Medium Hard Flow 15 DWT for sale online
Types of Soldering and Flux - The Home Depot
soldering gun for jewelry making, SAVE 19%
Easy Flow Flux and High Temp Soldering Flux Paste Jewellery Flux Flux for Jewellery Making Gold Flux Silver Flux Platinum Flux
Recommended for you
-
 Oatey Safe Flo 1 lb. Lead-Free Silver Solder Wire 290252 - The Home Depot23 May 2024
 -
 Oatey Safe Flo 8 oz. Lead-Free Silver Solder Wire (2-Pack) 29024223 May 2024
 -
 Home23 May 2024
 -
 Silver Solder Wire23 May 2024
 -
Alpha Metals Lead-Free Plumbing Solder - 16 oz23 May 2024
-
 Silver Brazing Solder Wire - 56% - AWS BAg-7 - Size: 1/16 + 6.5 Oz Fl – Mundaka Technologies23 May 2024
 -
 Oatey 29025 1 lb Safe-Flo Silver Wire Solder23 May 2024
 -
 Oatey Soldering Kit with 1.7 oz. Lead-Free Water Soluble Flux Paste and 4 oz. Silver Solder Wire 506912 - The Home Depot23 May 2024
 -
 Worthington 331755 16 oz. Premium Lead-Free Solid Wire Solder23 May 2024
 -
 2.5mm Sac0307 Solid Core Lead Free Tin Silver Solder 180g - China Tin Silver Solder, Solid Core Solder23 May 2024
You may also like
-
 4 Ways to Tell if a Pearl Is Real - wikiHow23 May 2024
 -
 Picture/Perfect Professional Light Box for Tracing - Ultra Thin Portable LED Light Pad, 3 Level Brightness Advanced Filter to Prevent Eye Fatigue23 May 2024
 -
 Yarn Bee Stitch 101 50/50 Color Sage Green Lot of 2 Skeins 3.5oz 180yards23 May 2024
 -
 Xtozon Rubber Seam Roller Car Sound Deadener Noise Filter Application, Sound Heat Insulation Mat Wallpaper Application, Wallpaper Roller for Auto Car23 May 2024
 -
 Coloring books for Adults; Do they relieve stress?23 May 2024
 -
 Best flower press kit23 May 2024
 -
 Mini Cows For Sale23 May 2024
 -
 49 Best Gifts for Book Lovers 202423 May 2024
 -
 The Fitzwilliam Throw Blanket- A Free Crochet Pattern - Evelyn And23 May 2024
 -
 Wolf DO30PE/S/PH 30 E Series Professional Built-In Double Oven23 May 2024