How to Install Fiber Seats – Restoration Supplies
By A Mystery Man Writer
Last updated 01 Jun 2024

Upgrade your old chair with a stylish and comfortable fiber seat! Our easy-to-follow tutorial will guide you through the process of crafting and attaching the perfect fiber seat for your chair.
Explore for top-quality antique furniture restoration products. Over 40 years of expertise. Transform your restoration dreams today!
Supplies Needed: Replacement Seat Decorative Nails 100 to 150 grit Sand Paper Thick sheet of Paper Pencil Power saw or a sharp Knife Ruler or Tape Measure Fiber seats are used in chairs that originally had a leather seat, a wooden seat, or a caned seat, such as the chair pictured. This chair is an ideal candidate for a fiber seat! This is a fiber seat, in all its glory Just waiting to be shaped and attached to a chair! First, get a piece of a thick paper about the diameter of the chair's seat, then crease the paper on the inner edges of the seat's hole. This should give you a fairly accurate size of the hole itself. You will want your fiber seat to be at least 1 Larger than the hole on All of the sides. To do this: Take a measuring instrument, and trace a line ~1 outward from the crease. This will be the pattern for your Fiber Seat. Once satisfied with the shape, cut the paper along your outer line.Center the pattern on the topside of the fiber seat and trace it with a pencil. Using a pencil will allow you to make adjustments, if needed. Cut the fiber seat using a band saw, scroll saw or jigsaw for best results. If using a jigsaw, use a fine blade for metal and wood cutting. If a power saw is unavailable, a sharp craft knife will work. To do this, carefully cut in short segments along the line several times until you've cut through the fiber. Sand the edge of the seat to a smooth bevel using from 100 to 150 grit sand paper. You can add protection and a little color to your seat by applying a clear finish. If you would like more color options, you may apply a stain, oil-based paint or water-based paint & clear finish to the Fiber Seat. *It is a good idea to experiment with the color on the back of the seat board, or on the cut off scraps, to be sure you'll get the desired color.Attach the seat to the chair using Decorative Tacks. Space the tacks according to your preference, but not to exceed 2 from center of tack to center of tack. There you have it! You have now completed your Fiber Seat lesson, and should you have any additional questions, feel free to Contact Us!

Front Bucket Seat Covers Installation for Sedan Truck and SUV- FH Group®

Controller & Executive Controller

UPC-89TF-6 - Unico Install Kit, 2, 1 Fiberglass Plenum, TFS, (6 pk) – High Velocity Outlets

Seat Cover Installation Part 2 for Cars, Van & SUVs

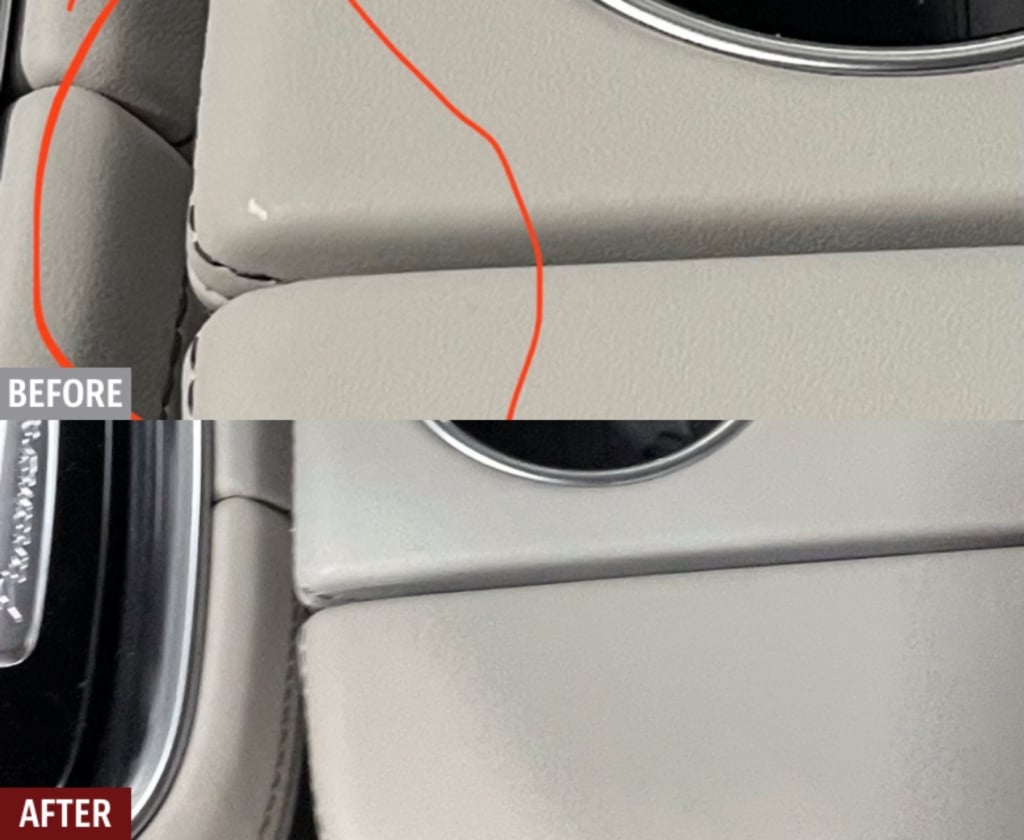
Boat Seat Repair - Plastic Molding Restoration - Fibrenew
Car Leather Repair - Plastic & Vinyl Restoration: Fibrenew

How to Install Solid Rear Bench Car Seat Covers
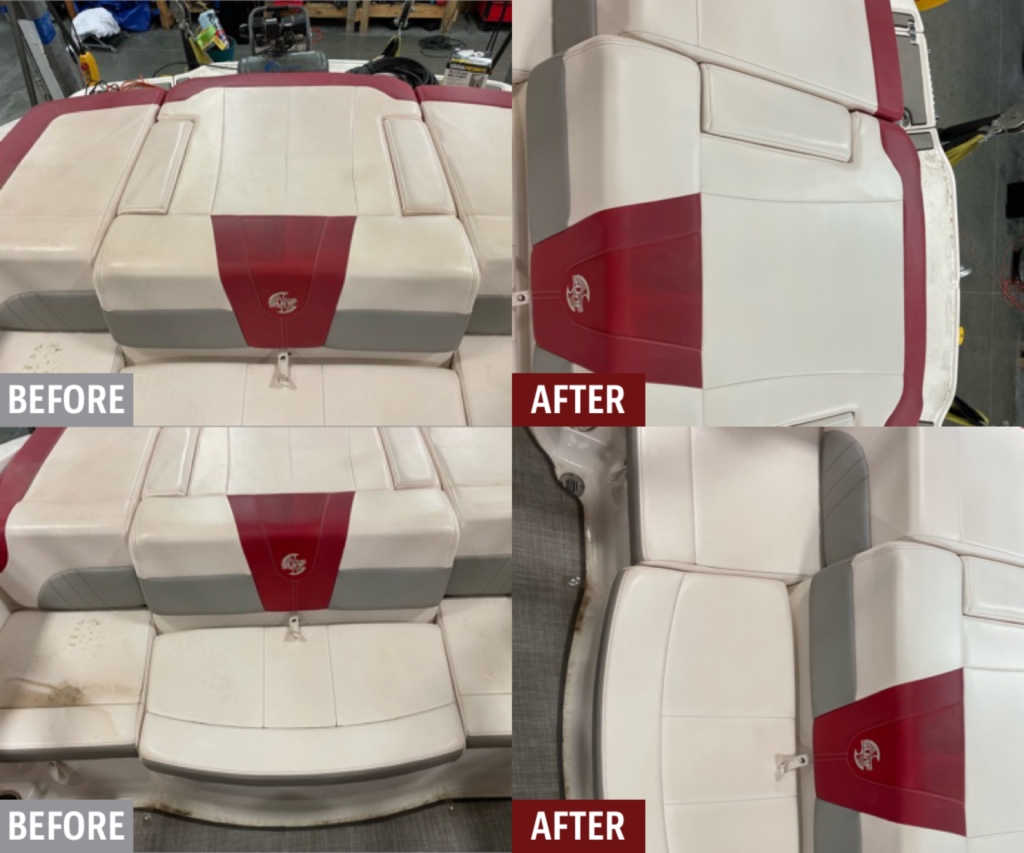
Boat Seat Repair - Plastic Molding Restoration - Fibrenew

How to Install Fiber Seats Chair repair, Antique wooden chairs, Upcycled furniture diy

How to Reupholster Bucket Seats With a Kit

Fibrenew Puyallup
Recommended for you
-
 LIFKOME Chair Seat Replacement Wood Chair Seat Replacement Kitchen Chair Cushions Pad Dining Chair Seat Top Surface Pad Seating Covers for Metal01 Jun 2024
 -
 HOMSFOU Chair Panel Solid Wood Seat Board Accessories Stool Seat Covers The Office Wooden Chair Seat Replacement Chair Seating Part Chair for Dining01 Jun 2024
 -
 Flash Furniture Perry Rustic Walnut Wood Seat for Colorful Metal Chairs01 Jun 2024
 -
 Yardwe Chair Panel Solid Wood Seat Board Accessories Home Stool Replacement Accessory Chair Supplies Chair Seat Covers Chair Seat Replacement for01 Jun 2024
 -
 Patio Chair Seat Outdoor Cushion Wholesale Outdoor Replacement Rattan Sofa Cushions - China Pillows & Cushions and Seat Cushions price01 Jun 2024
 -
 OFFICE LOGIX SHOP Mirra Chair Seat Replacement - Flex Front Type - 1st Generation01 Jun 2024
 -
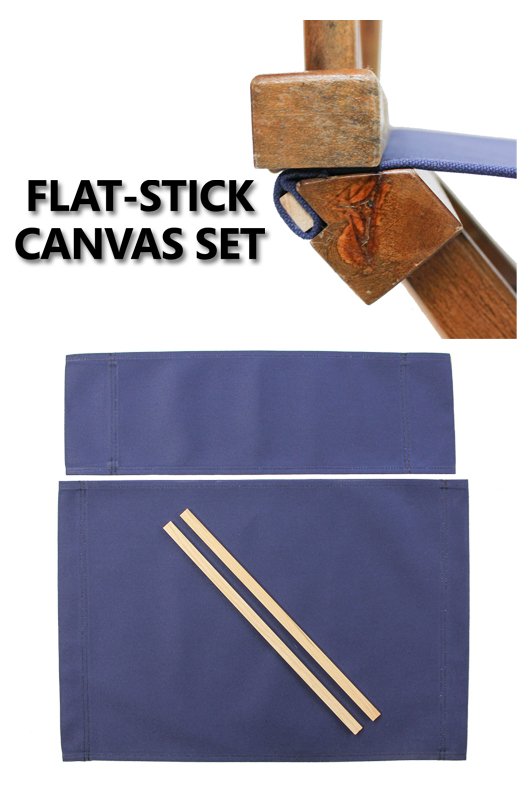 Flat-Stick Director's Chair Seat and Back Set01 Jun 2024
 -
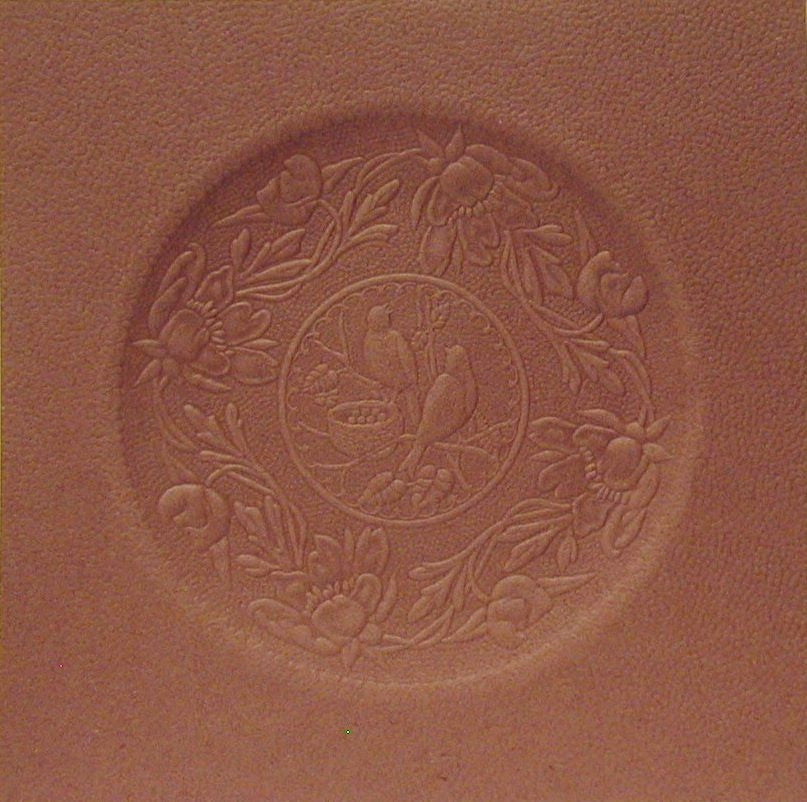 Fiber Seat Board - Birds Nesting – Restoration Supplies01 Jun 2024
 -
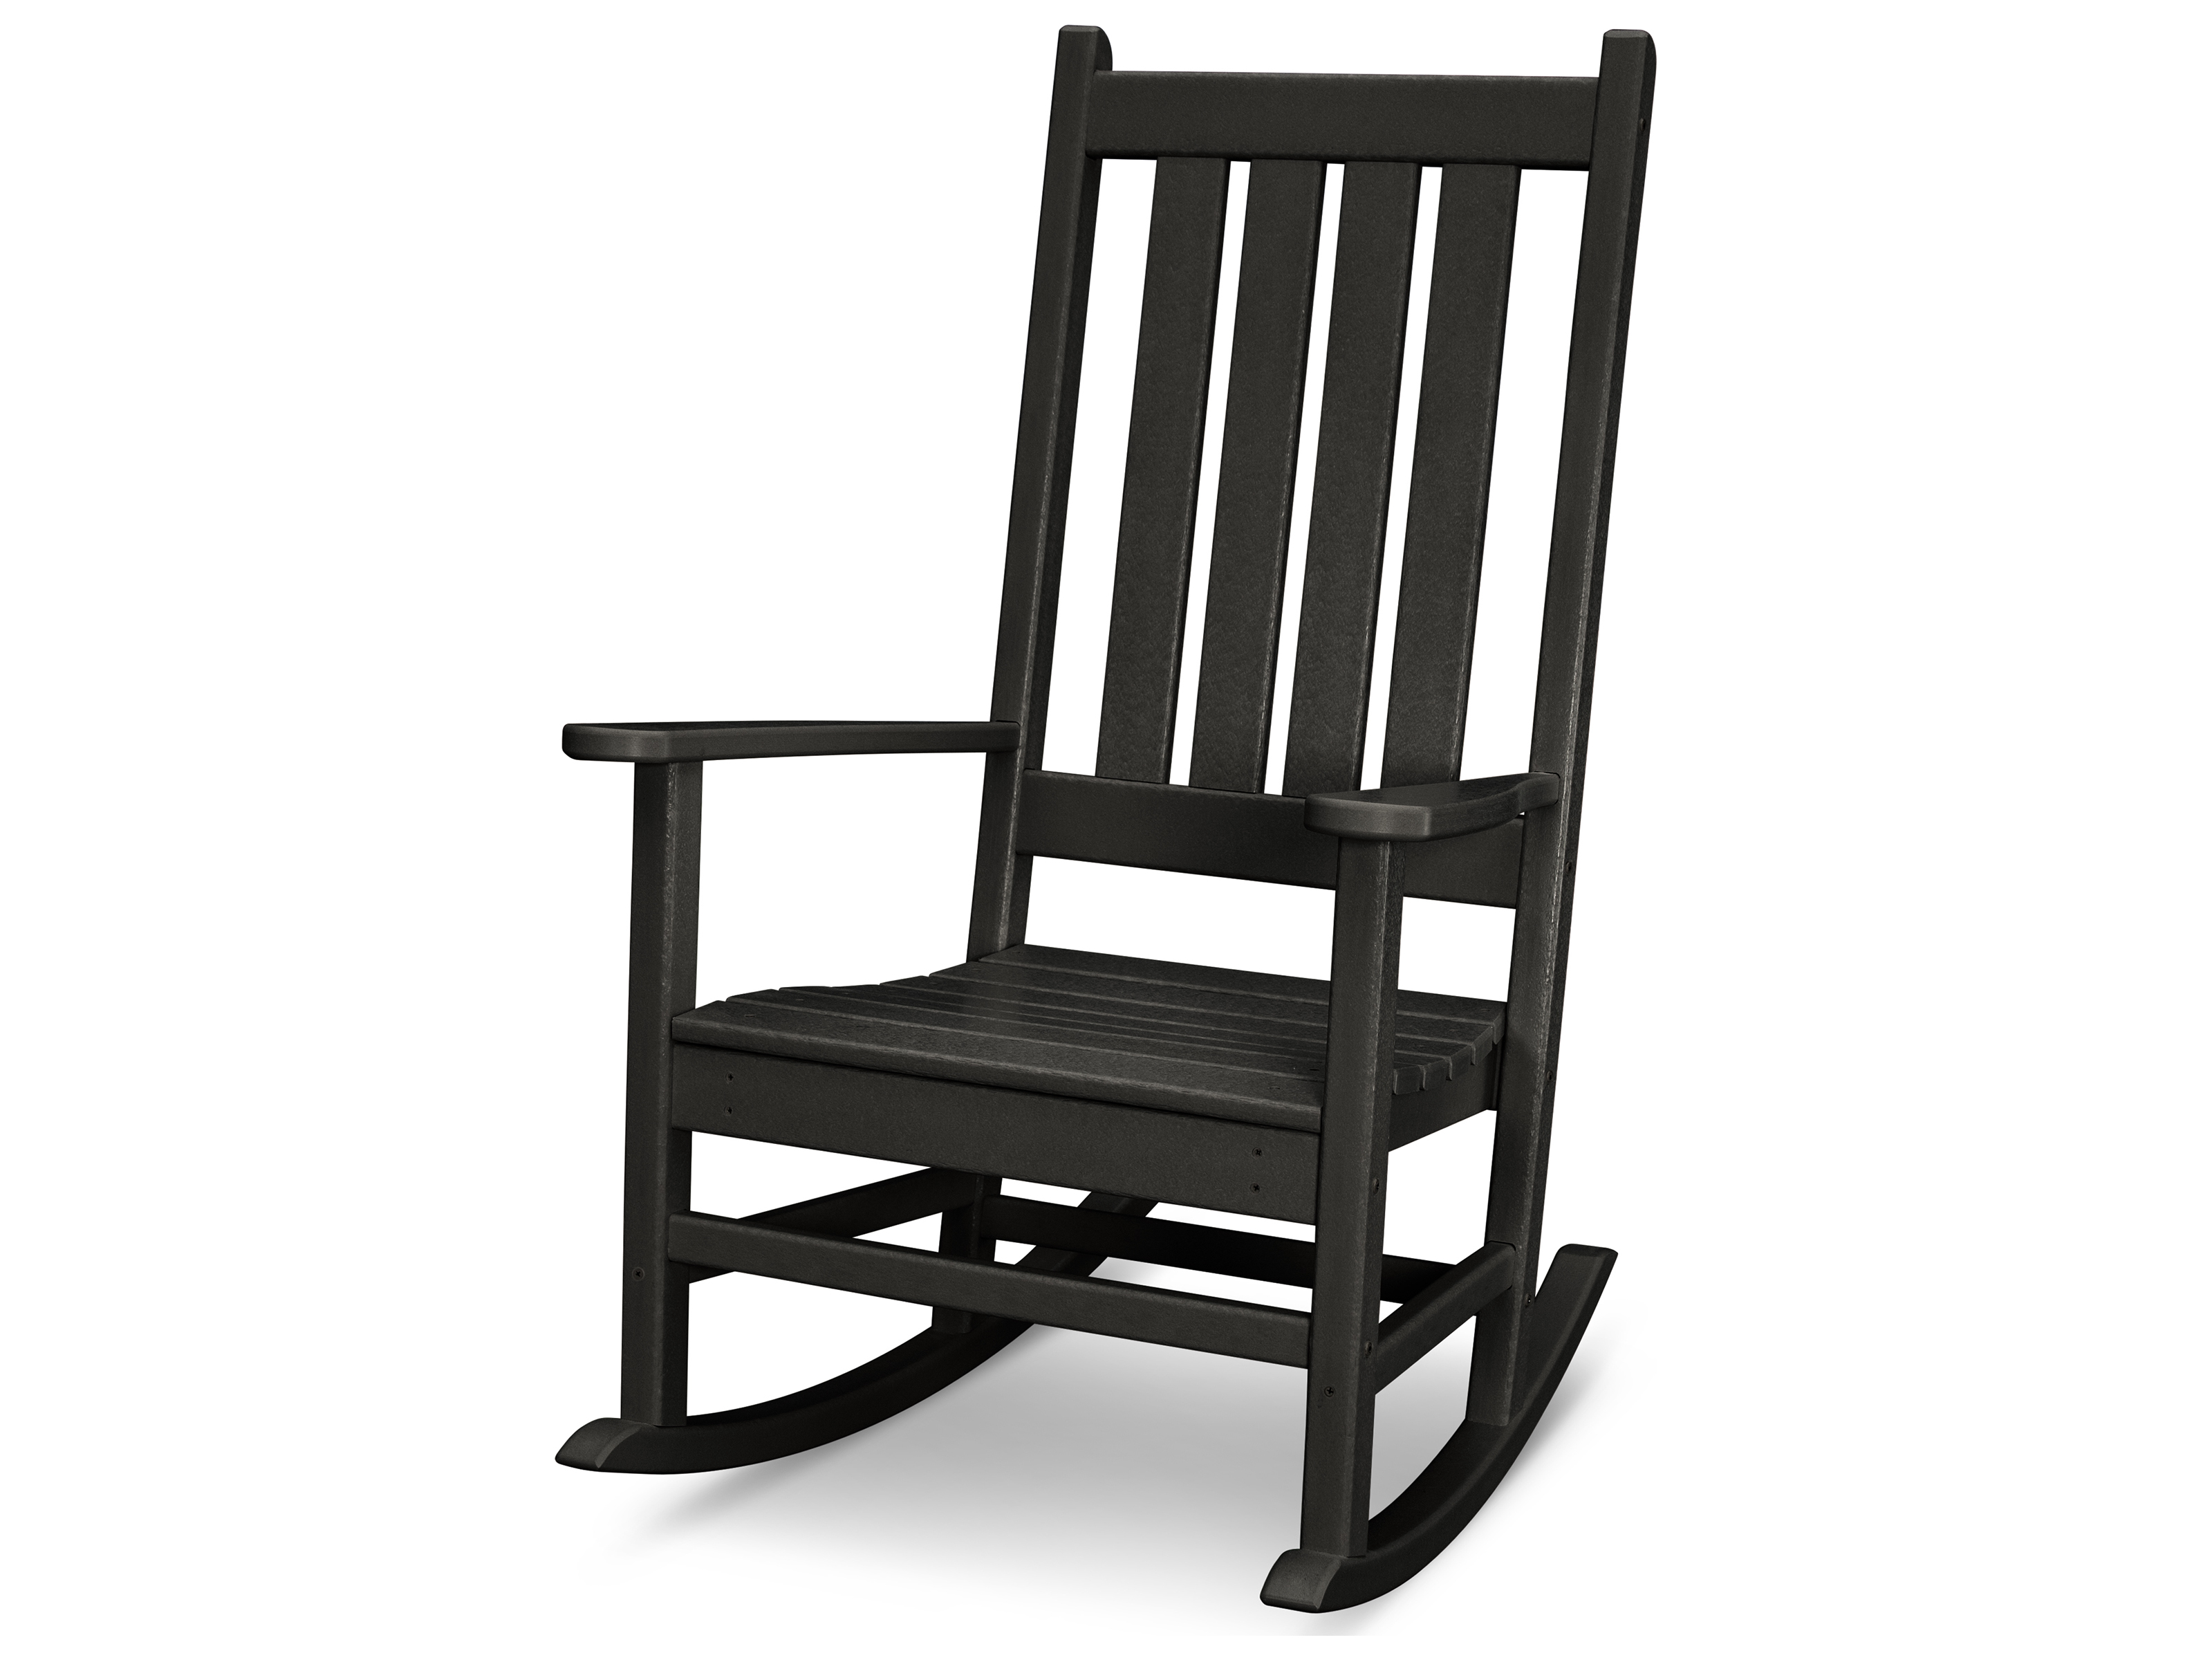 POLYWOOD® Vineyard Porch Rocking Chair Seat Replacement Cushion01 Jun 2024
 -
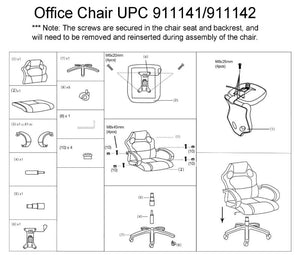 Replacement parts for Office Chair model 911141/911142/911048 – Backyard Expressions01 Jun 2024
You may also like
-
 UO DIY: How to Press and Frame Flowers - Urban Outfitters - Blog01 Jun 2024
 -
 Red Square Foil Sequin – Sal Tex Fabrics, Inc.01 Jun 2024
 -
 Tayah Handbag - Silver DIAMANTE-BLACK01 Jun 2024
 -
 Talc-Free Body Powder for Body Odor Sweat & Moisture (3 pack)01 Jun 2024
 -
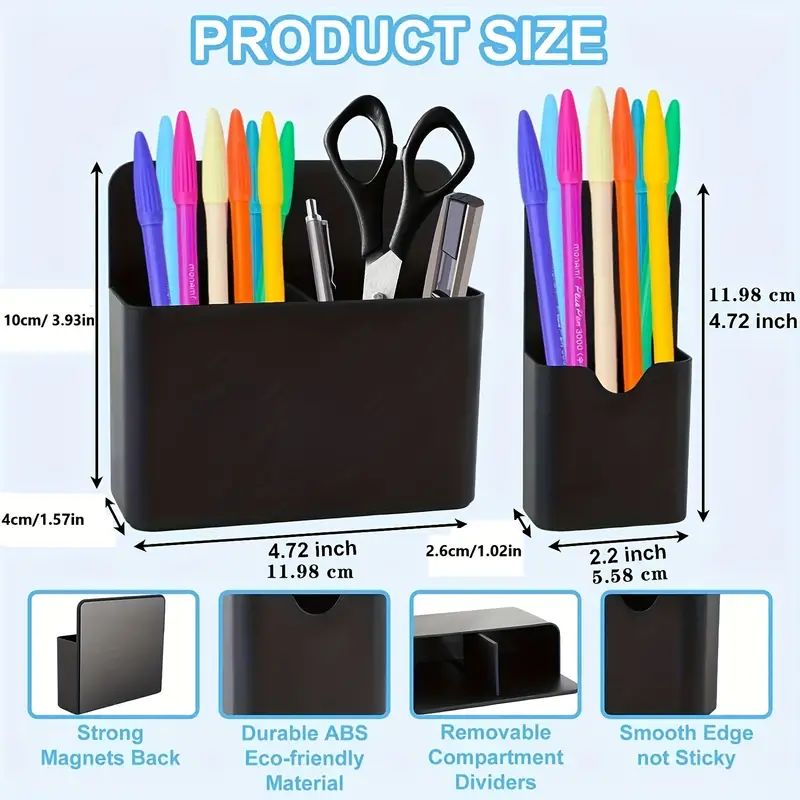 Magnetic Pen Holders Magnetic Dry Erase Marker Holder With - Temu01 Jun 2024
 -
 DIY Lipstick Mold, 2 Holes Dual Use DIY Lipstick Aluminum Mold for Makeup Cosmetics-Lip Balm Make Tool Kit Set01 Jun 2024
 -
 LOL Surprise Glitter Color Change Pets01 Jun 2024
 -
 Heat Transfer Vinyl 19 Width SILVER HOLOGRAM HTV – Ace Screen Printing Supply01 Jun 2024
 -
 Burnes Florence Faux Leather Scrapbook Photo Album Acid Free Archival 11x12 in01 Jun 2024
 -
 Knitcraft Purple Everyday Chunky Yarn 100g01 Jun 2024