Creative Washi Tape Swatch Spread Tutorial For Your Bullet Journal
By A Mystery Man Writer
Last updated 31 May 2024

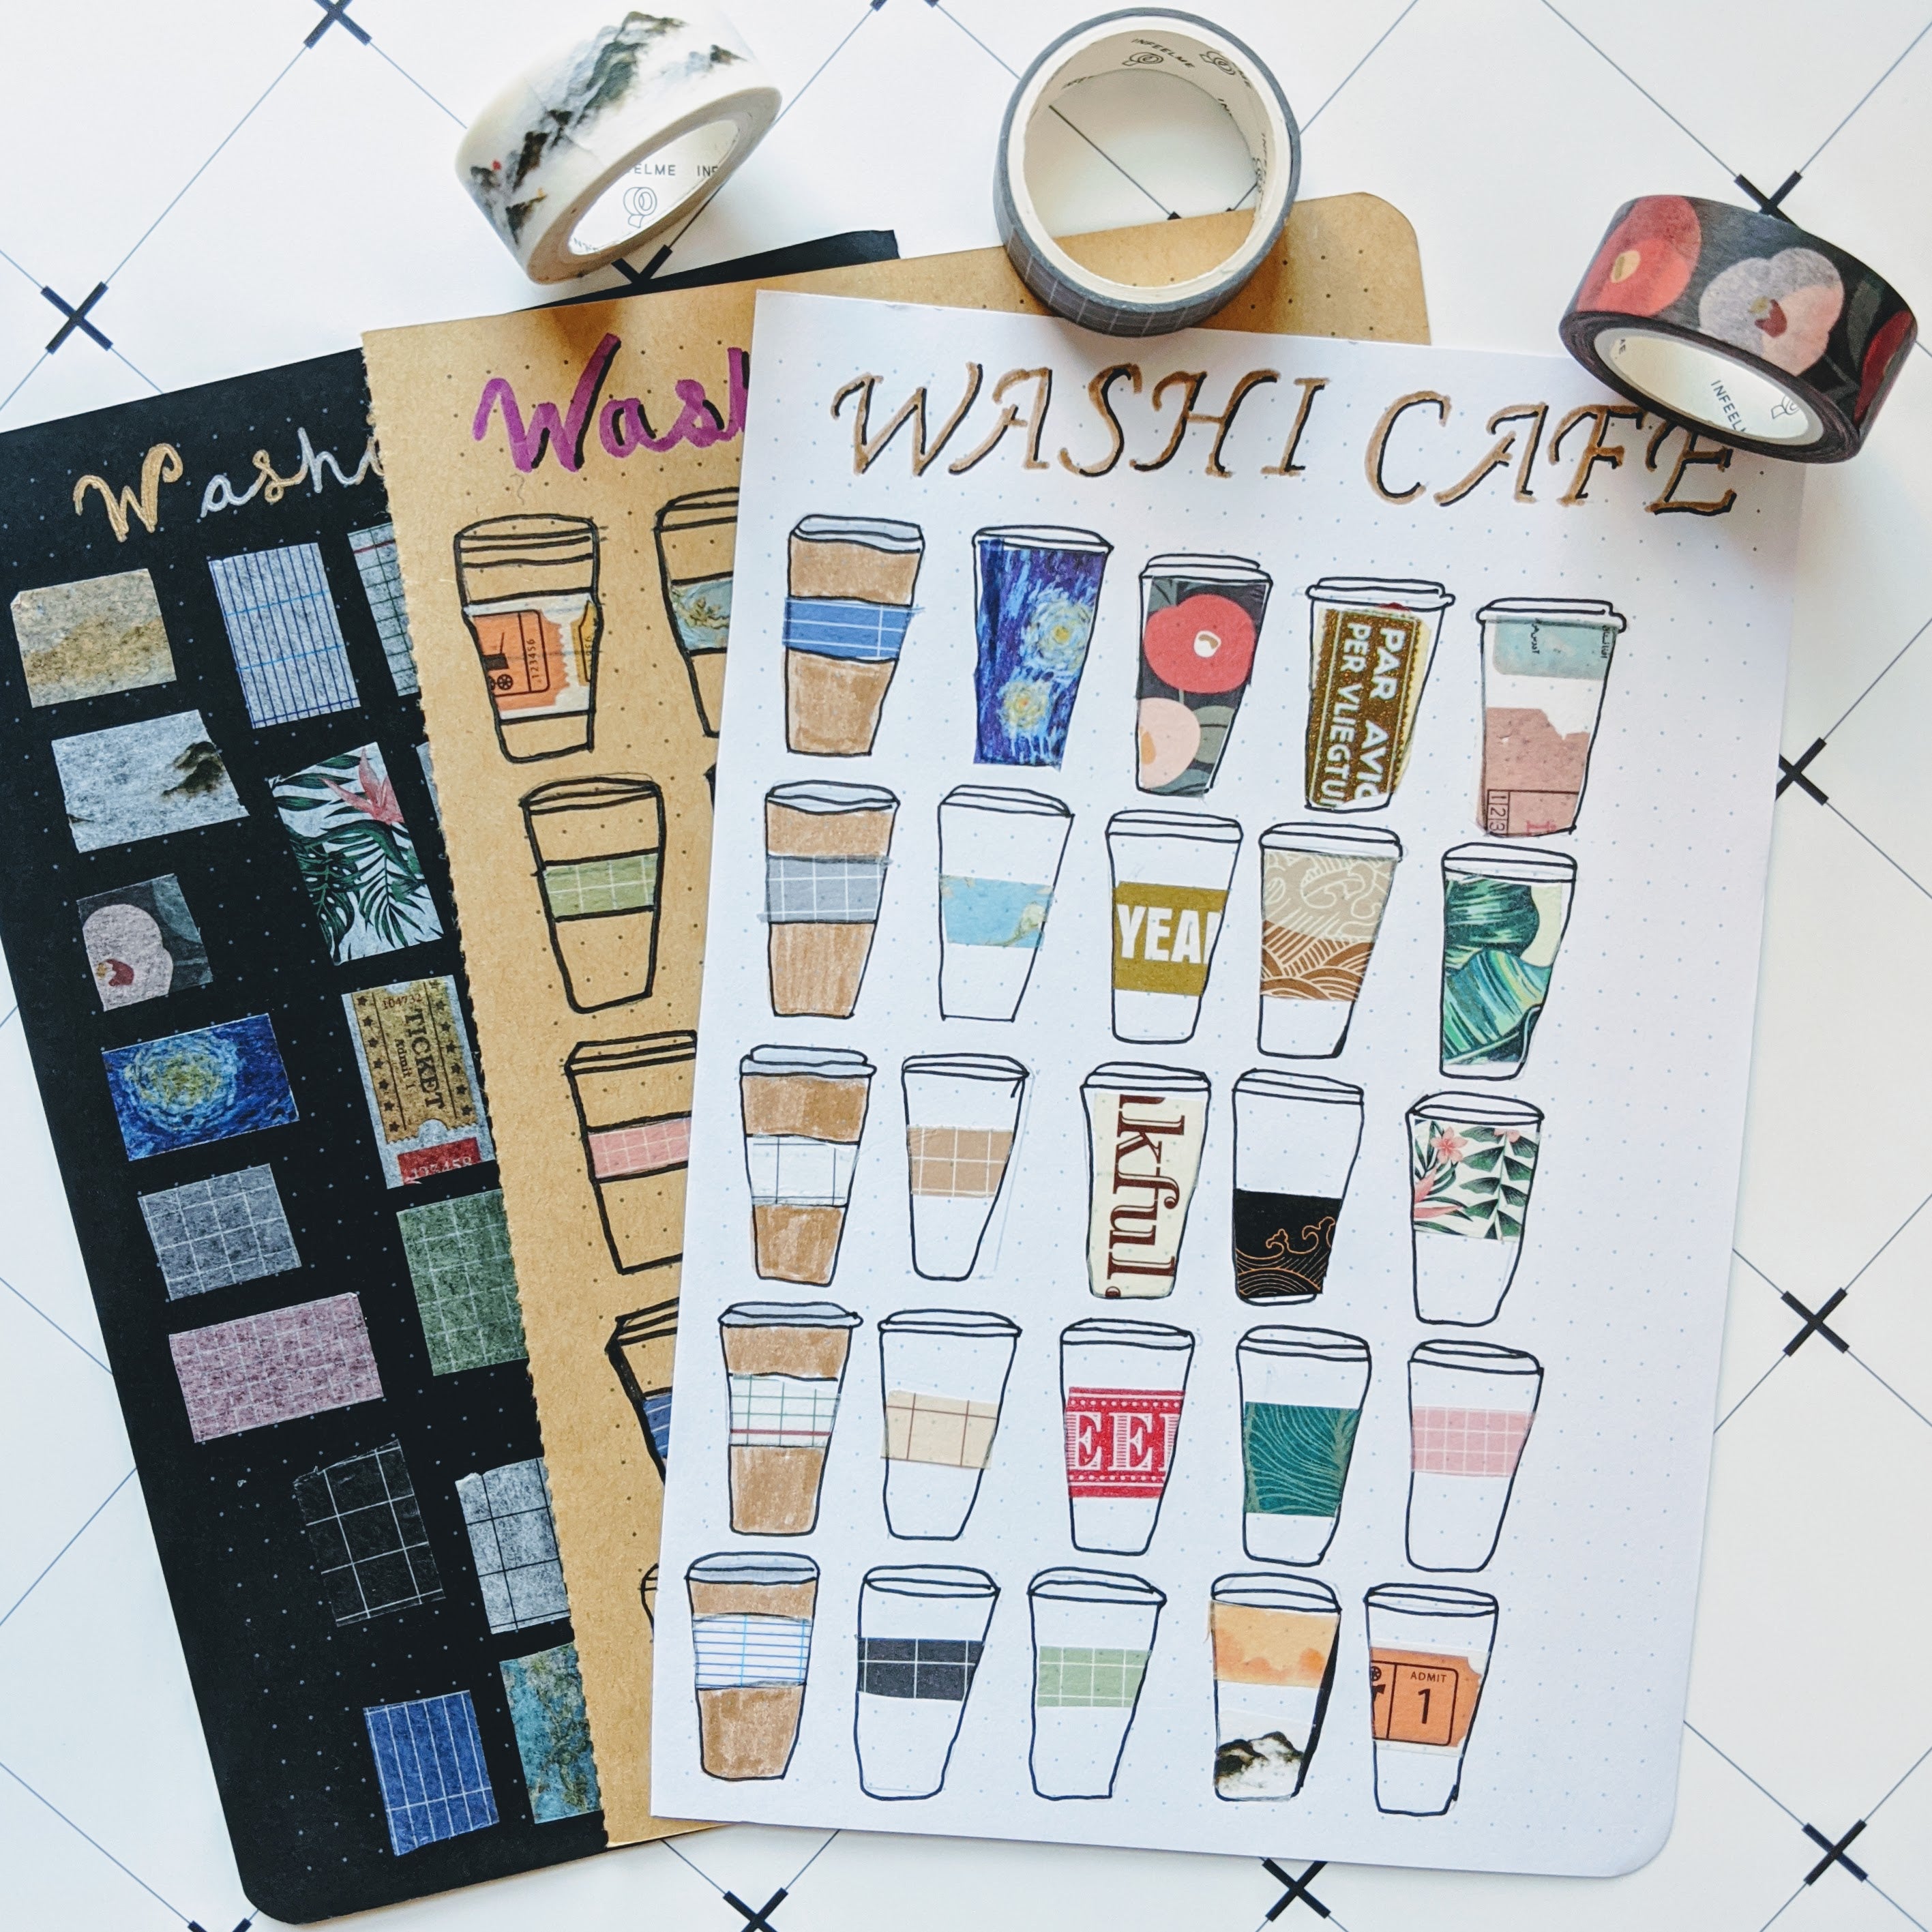
Hello friends! Today I'm sharing a tutorial on how to create a fun washi tape swatch page in your bullet journal! Creating bullet journal swatch pages is a great way to keep track of all your washi tape, and it adds some color to your pages! Read to try out this creative bullet journal Washi Tape spread in your journal
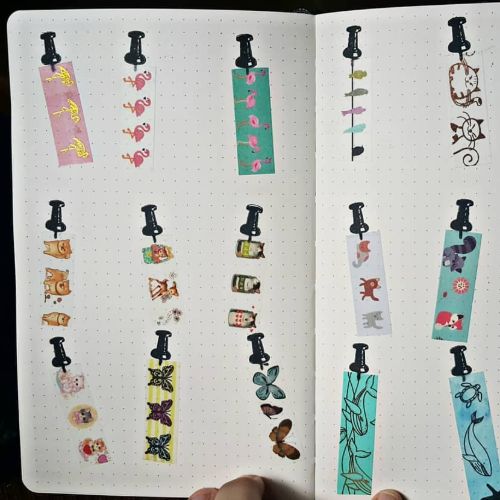
Hello friends, Adrienne from @studio80design here to share a tutorial on how to create a fun washi tape swatch page in your bullet journal! Creating swatch pages is a great way to keep track of all your washi tape, and it adds some color to your pages! I’ve also found that washi tape looks very different on the roll versus when you actually unroll it and add it to your paper! Let’s get started! Tools you’ll need: Archer and Olive A5 Signature Dot Grid Notebook Archer and Olive Washi Tape Tombow MONO Drawing Pen 03 Tombow Fudenosuke Hard Tip Brush Pen Scissors Step 1 The first step is to use the Tombow Fudenosuke Hard Tip Brush Pen to write the title at the top of the page in your Archer and Olive Dot Grid Notebook. Step 2 Next, use the Tombow MONO Drawing Pen 03 to draw paint brushes and paint rollers on the sides of the page. It helps to plan the page out before you ink, so you may choose to pencil everything in beforehand. I tried to make them all just a little different from each other! A standard size washi tape roll takes up three squares in the dot grid notebook. I added an extra line in between each one so it wouldn’t be too crowded. Overall I was able to fit 8 spaces for washi tape swatches! Step 3 Grab your first washi tape and unroll it, measuring the distance you’ll need for the swatch. The first swatch goes on a roller, so I used scissors to round the corners on the tape. Then I ripped the other end so it would look more organic, like actual paint. Step 4 Continue to add the washi tape swatches on your page until it’s full! Erase any extra pencil marks, if you have them! That’s all for this washi tape swatch page! I had so much fun creating this, and now I’m off to swatch the rest of my Archer and Olive washi tape! Don’t forget you can code STUDIO10 for 10% off on the Archer and Olive website, including washi tape! For more inspiration like this, make sure to follow me @studio80design!
Hello friends, Adrienne from @studio80design here to share a tutorial on how to create a fun washi tape swatch page in your bullet journal! Creating swatch pages is a great way to keep track of all your washi tape, and it adds some color to your pages! I’ve also found that washi tape looks very different on the roll versus when you actually unroll it and add it to your paper! Let’s get started! Tools you’ll need: Archer and Olive A5 Signature Dot Grid Notebook Archer and Olive Washi Tape Tombow MONO Drawing Pen 03 Tombow Fudenosuke Hard Tip Brush Pen Scissors Step 1 The first step is to use the Tombow Fudenosuke Hard Tip Brush Pen to write the title at the top of the page in your Archer and Olive Dot Grid Notebook. Step 2 Next, use the Tombow MONO Drawing Pen 03 to draw paint brushes and paint rollers on the sides of the page. It helps to plan the page out before you ink, so you may choose to pencil everything in beforehand. I tried to make them all just a little different from each other! A standard size washi tape roll takes up three squares in the dot grid notebook. I added an extra line in between each one so it wouldn’t be too crowded. Overall I was able to fit 8 spaces for washi tape swatches! Step 3 Grab your first washi tape and unroll it, measuring the distance you’ll need for the swatch. The first swatch goes on a roller, so I used scissors to round the corners on the tape. Then I ripped the other end so it would look more organic, like actual paint. Step 4 Continue to add the washi tape swatches on your page until it’s full! Erase any extra pencil marks, if you have them! That’s all for this washi tape swatch page! I had so much fun creating this, and now I’m off to swatch the rest of my Archer and Olive washi tape! Don’t forget you can code STUDIO10 for 10% off on the Archer and Olive website, including washi tape! For more inspiration like this, make sure to follow me @studio80design!
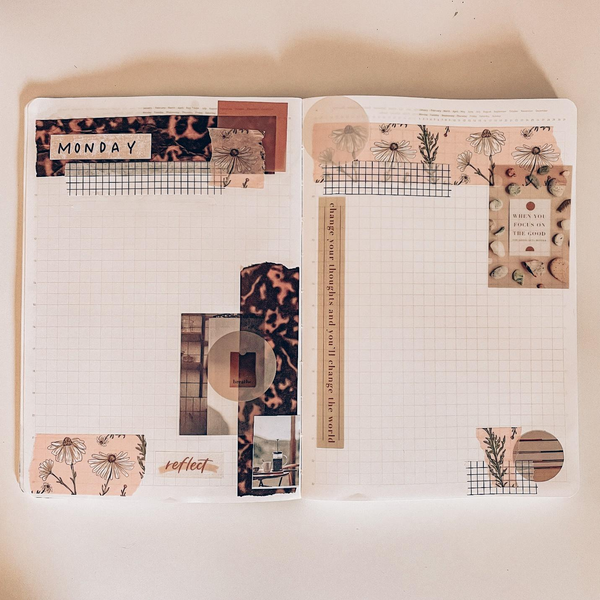
Creating a scrapbook style spread

Blog– Translation missing: en.general.meta.tags– Translation

Art & craft

Creative Washi Tape Swatch Spread Tutorial For Your Bullet Journal

Journaling with Washi Tape, the Number One Rule
Genius Ways To Use Washi Tape In Your Bullet Journal - The Tiny Life
How to use a Bullet Journal (in 6 simple steps)

3 Ways to Fill a Notebook

The Washi Tape Shop Unboxing and Happy Planner PLAN with me!

Top 10 washi stickers journal ideas and inspiration

Simple Planner Spreads Archives - Chocolate Musings

Pin on Creative Washi Tape Ideas
How To Start A Bullet Journal

My cute little A7 notebook and some spreads. Completely new to
Recommended for you
-
 Free Digital Washi Tape - Designs By Miss Mandee31 May 2024
 -
 Washi Tape Swatch Ideas + FREE PRINTABLE31 May 2024
 -
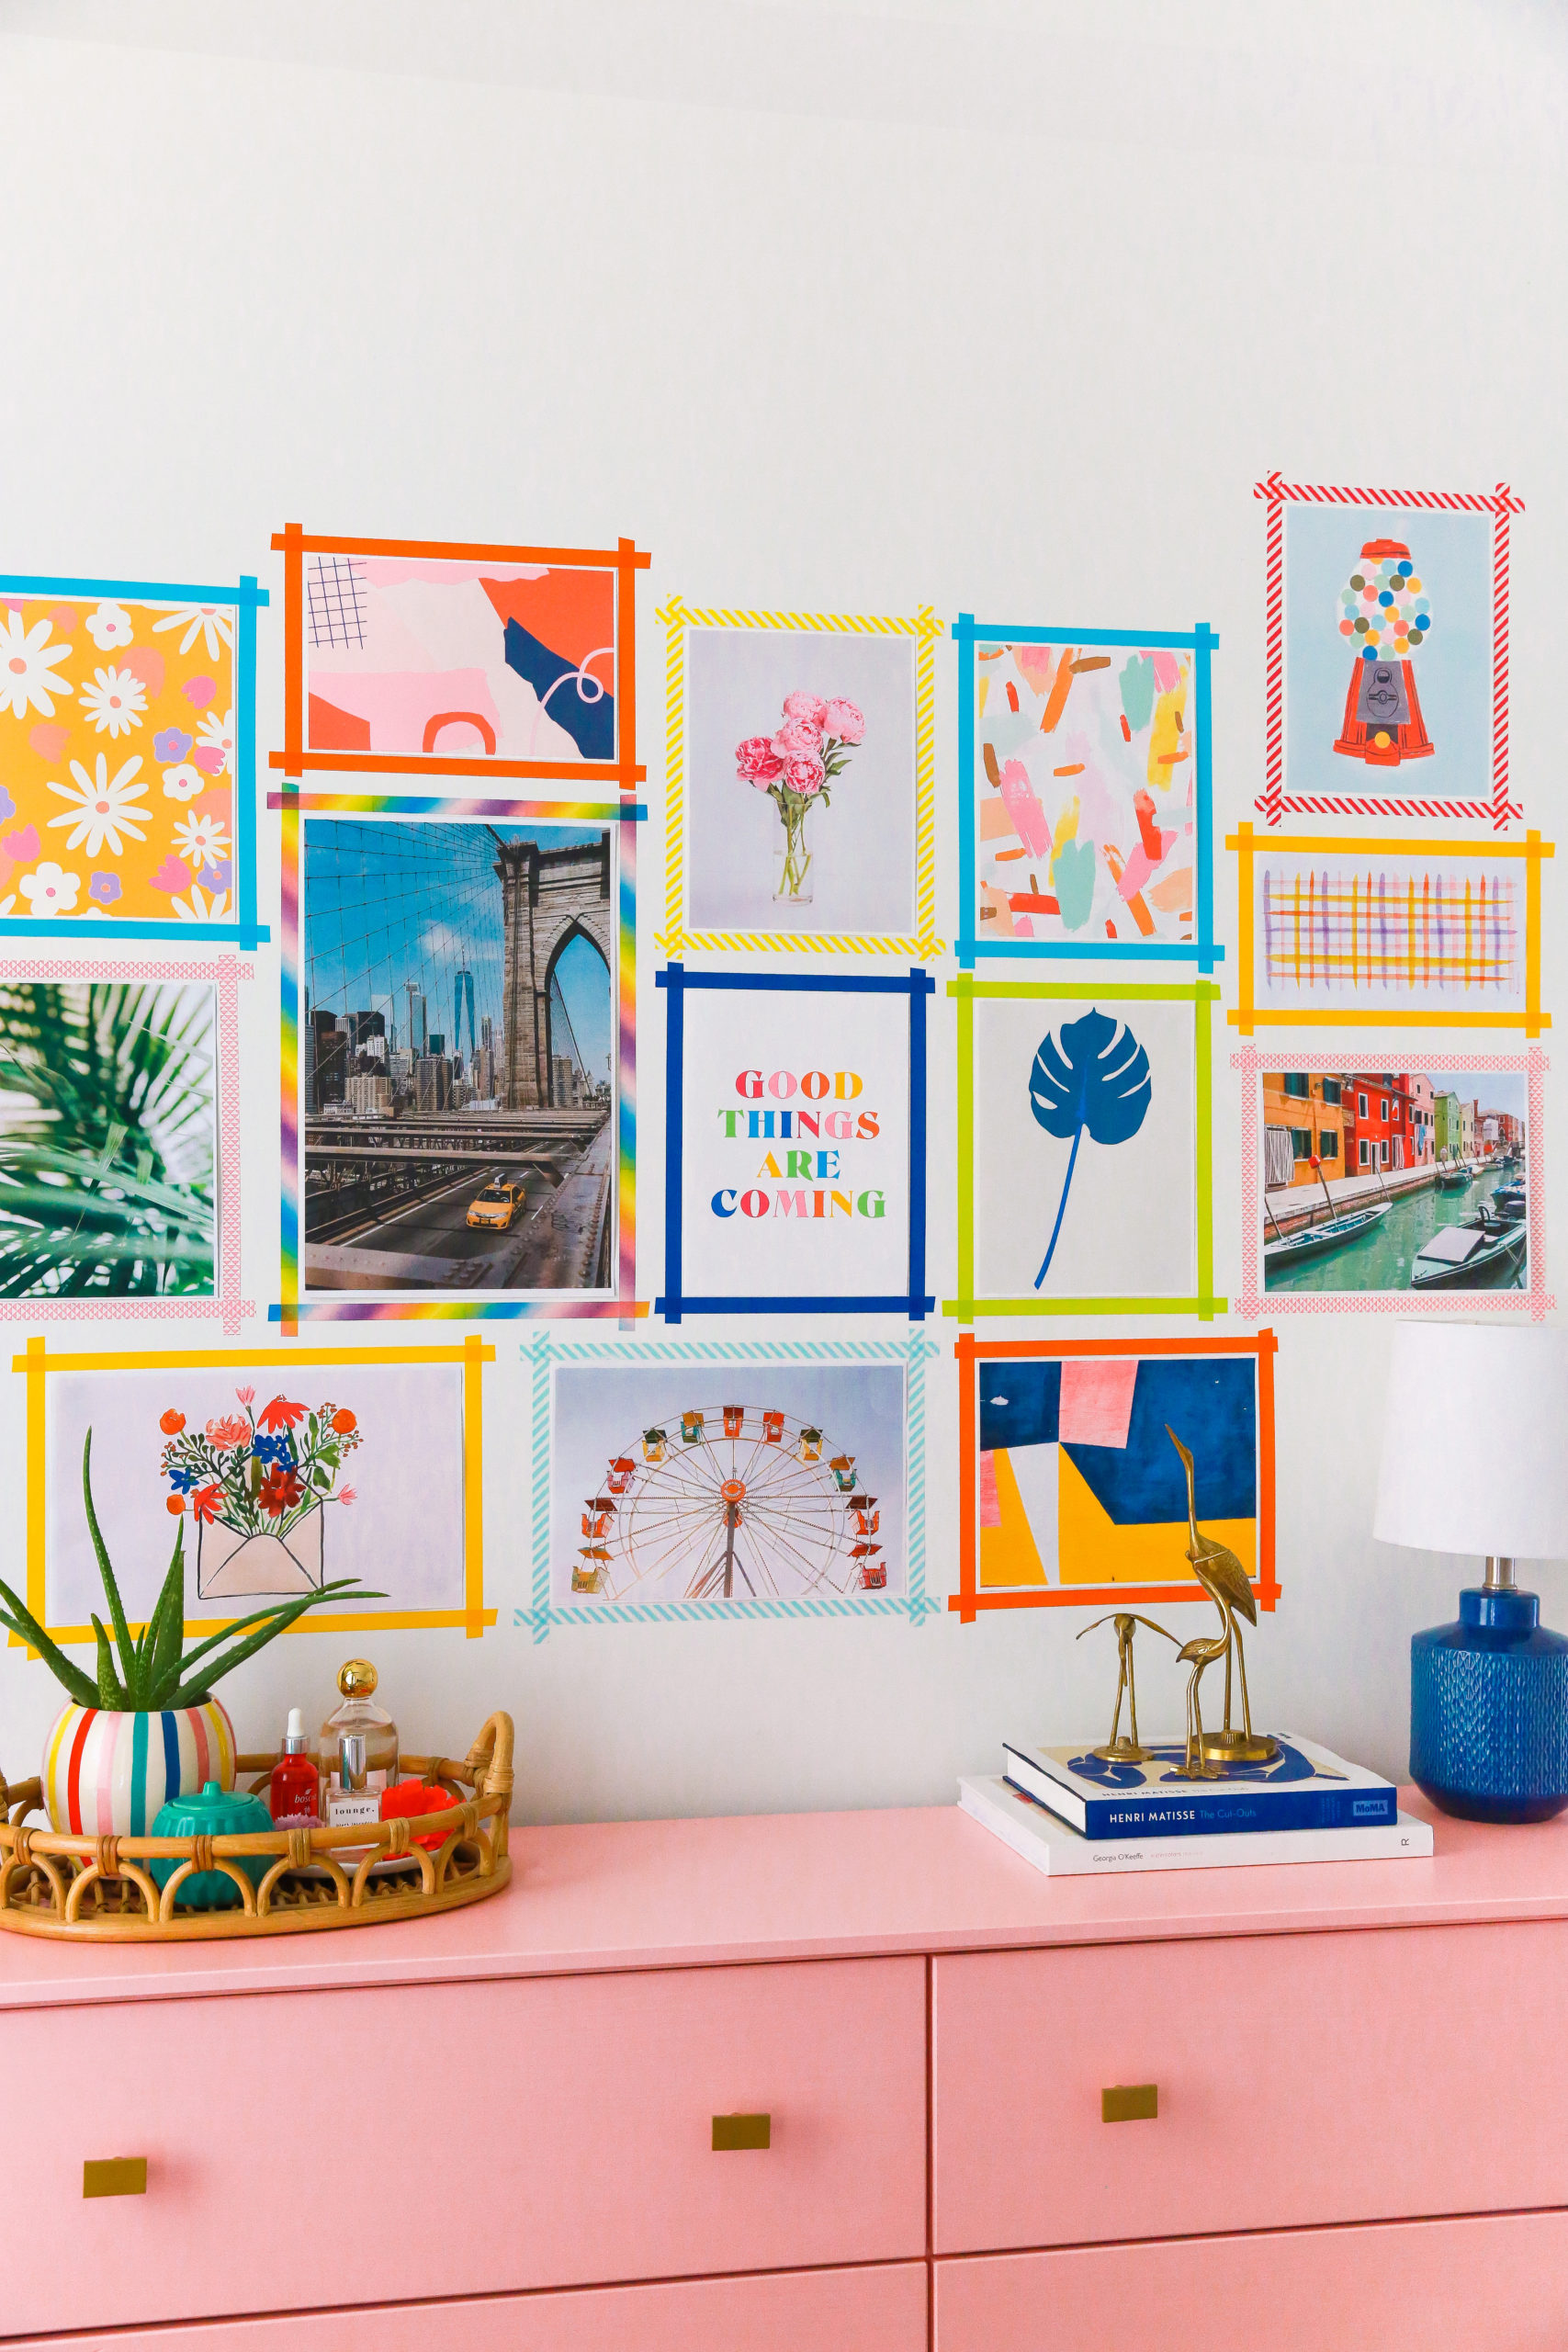 DIY Washi Tape Gallery Wall - The Crafted Life31 May 2024
 -
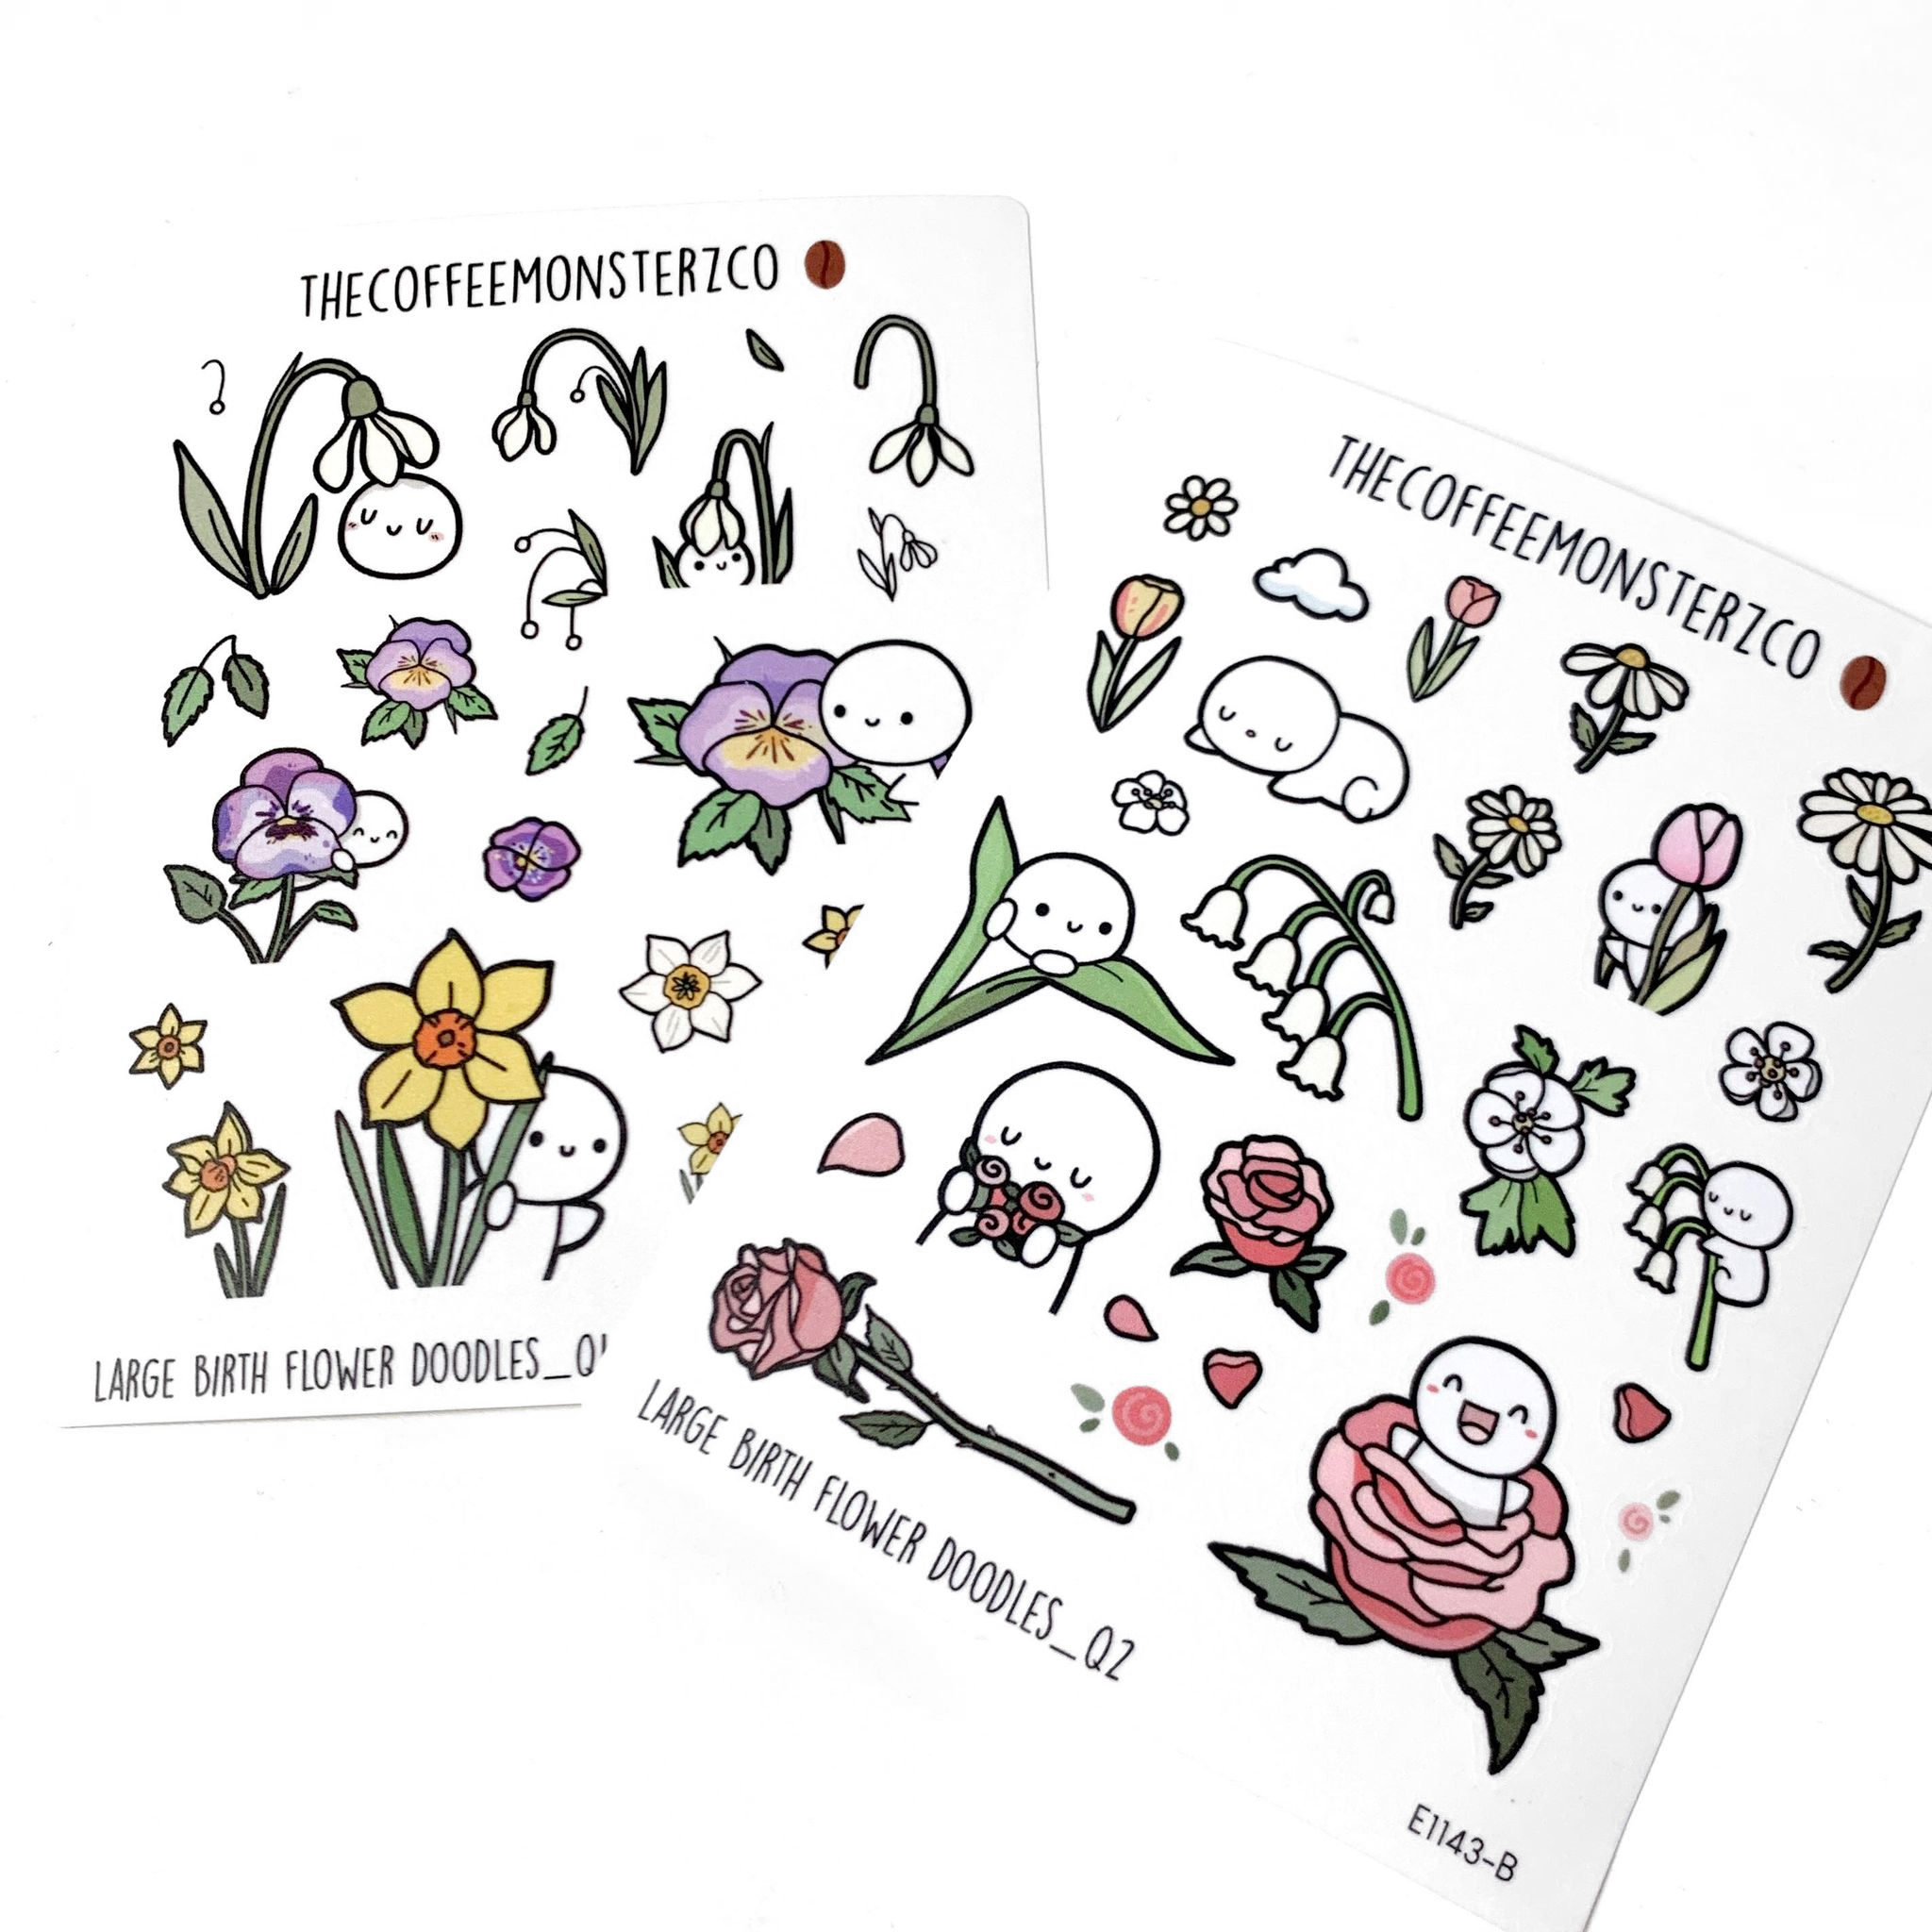 2024 Large Birth Flower Doodles Part 1 (washi stickers) – TheCoffeeMonsterzCo31 May 2024
 -
 Planner Washi Stickers31 May 2024
 -
 Printable WASHI TAPE Stickersdigital File Instant Download Polka Dots, Florals, Bible Journaling, Happy Planner, DIY, Pastel, Pink31 May 2024
 -
 How to make transparent washi tape / handmade transparent tape for journal /easy to make31 May 2024
 -
 Watercolor - Washi Stickers – Wonderland22231 May 2024
 -
 Kawaii Washi Stickers Set (50 Sheets) Cute Pet Animal Girl Boy Food Summer Drink Self-Adhesive Sticker DIY Label for Scrapbooking Journaling Water31 May 2024
 -
 Playful Dogs Washi Stickers31 May 2024
You may also like
-
 Wet Brush Pro Mineral Sparkle Paddle Detangler - Wine31 May 2024
 -
Prime Hydration Drink Mix - Blueberry (6 On The Go Sticks) by PRIME at the Vitamin Shoppe31 May 2024
-
 White Folding Swing Craft Table Storage Shelves Cabinet31 May 2024
 -
 MEDENTRA Professional Jewelry Making Tools Kit Repair Beading Maintenance Sets31 May 2024
 -
 Large capacity pencil case organizer pouch – Your Every Day Story31 May 2024
 -
 wholesale customize 1.5 oz 3oz pin31 May 2024
 -
 Buy PEAK Herculiner Bed Liner 1 Qt., Black31 May 2024
 -
 Premium PVC Clear Ice Hockey / Roller Hockey Leg Tape / Sock 4 Rolls31 May 2024
 -
 BENECREAT 2 Rolls Fabric Tulle Snowflake Tulle Roll 6 x 10 Yards for Decoration Bows, Craft Making, Wedding Party Ribbon - 20 Yards in Total (Light Sky Blue)31 May 2024
 -
 Metal Tins - Window Tin 120ml31 May 2024
